First things first, we’ll need to install Samba on the to-be server. Which can be done by using the command line:
sudo apt-get install samba
Once that’s complete, we’ll edit the system-wide Samba configuration to set up a new “share”. Run in a terminal:
sudo gedit /etc/samba/smb.conf
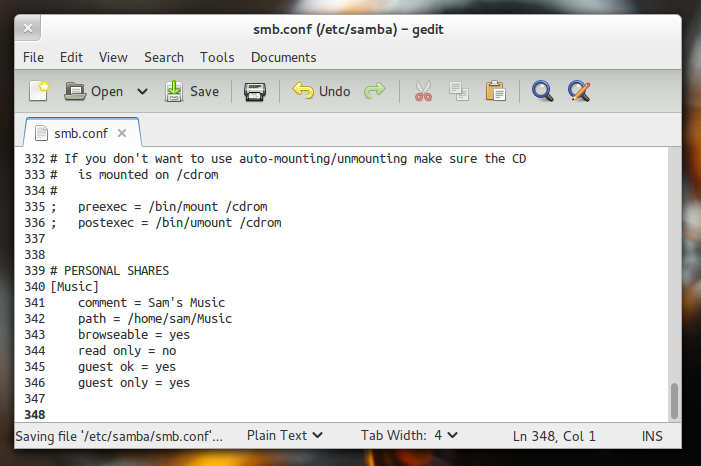
This’ll open a lengthy text file, where you can use the following template to create a simple Samba share to append (replacing the values with your own, of course) and save.
[ShareName] comment = An optional description of your share. path = /home/example/directory browseable = yes read only = no guest ok = yes guest only = yes
Just a brief explanation of these options:
* comment: a short (human-readable) description of your share, e.g. “My Share”. * path: the location of the folder you want to share, for example /home/yourname/Music. * browseable: whether the share location will be able to be browsed remotely. * read only: setting to “yes” means computers accessing the share cannot create/delete files. * guest ok: “yes” here means that computers can access this share without requiring a username or password. * guest only: this is optional, if ”yes” allows only guest access, i.e. no user login.
Of course, this is a configuration for a simple public share –public, as in anyone on the same network as would have access. Also, do not edit any other elements of the config file unless you know what you’re doing.
Now after a reboot, your Samba share ought to be up and running. Connecting to Your New Server
In your favourite file manager you can access the server by browsing your local network –from the sidebar in Nautilus, for example– which would show all devices, including your newly created server, that are connected. Alternatively in the location bar of your file browser you can enter the network address of the server:
smb:///
There you have it, your very own file server.


0 comments:
Post a Comment