Saturday, November 1, 2014
How to Change Your Hostname (Computer Name) on Ubuntu Linux
Ubuntu asks you to choose a name for your computer — known as a “hostname” — when you install it. You can change this hostname later, but Ubuntu doesn’t provide a graphical interface for doing so. The process here will also work on Linux Mint and other Debian-based Linux distributions. Other Linux distributions — for example, Fedora and other Red Hat-based distributions — use different methods for specifying a hostname.
Choosing a Hostname
A hostname is a name assigned to a “host” — a computer on a network. The hostname is basically just your computer’s name. It’s used to identify your computer on the network. It’s also shown very visibly in the terminal. You can change the hostname to anything that you want. However, you shouldn’t use the same hostname on two different computers on a network, as this can cause problems. The hostname is supposed to uniquely identify a computer on a network. Don’t get too fancy with your hostname. Host names can only contain letters (a through z), digits (0 through 9), and the hyphen character ( – ), and the period character ( . ). A hostname must begin and end with a letter or number — not a hyphen or period. Letters are also case-insensitive, so “COMPUTER” is equivalent to “computer.” The hostname must be between 2 and 63 characters long, although you’ll probably find shorter hostnames more convenient.
Edit Your /etc/hostname File
v Open a terminal window to get started. In Ubuntu’s Unity desktop, click the Ubuntu button to pull up the dash, search for Terminal, and press Enter.
You’ll need to edit your /etc/hostname file, which is where Ubuntu and other Debian-based distributions store the hostname. Run the following command in the terminal to open the /etc/hostname file in the graphical “gedit” text editor for editing:
sudo gedit /etc/hostname
(You could also use terminal-based text editors like nano or vi for this — you’d run the sudo nano /etc/hostname or sudo vi /etc/hostname commands to open the file for editing.
The /etc/hostname file is very simple. It’s contains only one thing — your computer’s hostname. To change it, just delete the existing hostname from the file. Replace it with your new desired hostname and then save the text file.
Ubuntu and other Debian-based distribution read the /etc/hostname file while booting up and set your computer’s hostname to the one contained in the file. Your change won’t take effect immediately — you’ll have to reboot or use the hostname command to change it immediately.
Edit Your /etc/hosts File
The hostname is also stored in the /etc/hosts file, where it’s set to redirect to your local computer — localhost. You’ll need to change the hostname in your hosts file, too. Open the /etc/hosts file for editing with a command like the following one:
sudo gedit /etc/hosts
(Once again, you could use any other text editor you want — nano, vi, or another graphical text editor of your choice.)
Locate your old hostname in the hosts file. It’ll be on a line that looks something like:
127.0.1.1 your-old-hostname
Once again, replace the old hostname with your new hostname. You can then save the /etc/hosts file.
Change Your Hostname Immediately
The change above will take effect when you reboot, but you can use the hostname command in a terminal to change your hostname immediately. This command only changes the hostname until the next time you reboot, so you do have to change the /etc/hostname file to change it permanently. Run the hostname command in a terminal window to specify a new hostname. If you chose an invalid hostname, this command will tell you and you can try again. Run the command like so:
sudo hostname your-new-hostname
Your computer’s hostname will be changed immediately, although the change won’t appear in the terminal immediately. The terminal will notice when you re-open it — or if you just open a new one.
That’s it; you should be done. On Linux distributions not based on Debian, there’s a different process. Check your Linux distribution’s documentation for more information. Some Linux distributions may even provide a graphical utility you can use to quickly change your hostname, so you don’t have to use the terminal — unless you want to.
Wednesday, July 2, 2014
Is Linux Operating System Immune to Malware
To be true, No! No OS on this earth can be ever be 100% immune to Viruses and Malware. But still Linux never had a widespread malware-infection as compared to Windows. Why? Let us find the reason behind this.
Some people believes that Linux still has a minimal usages share, and a Malware is aimed for mass destruction. No programmer will give his valuable time, to code day and night for such group and hence Linux is known to have little or no viruses. Had it been true, Linux should be the primary target of Malware infection because more than 90% of high end server runs on Linux today.
Destroying or Infecting one server means collapse of thousands of computer and then Linux would have been the soft target of hackers. So certainly usages share ratio is not in consideration for the above said fact.
Linux is architecturally strong and hence very much immune (not totally) to security threats. Linux is Kernel and GNU/Linux is the OS. There are hundreds of distributions of Linux. At Kernel Level they all are more or less the same but not at the OS Level.
Now suppose a malicious script is written for a RPM based system i.e., RedHat, Fedora, CentOs, it can’t infect a Debian based system and a destructive script written for Debian based OS can’t infect a RPM based System. Moreover a script that is going to perform a system-wide change needs root password.
If root password is confidential and strong enough, the OS is literally secure. Now a windows virus can not contaminate a Linux until Wine is installed and run as root. Hence it is suggested not to run wine as root.
You can not set a Linux System without setting up root password and user password. It means every user in a Linux System must have a password except ‘Guest‘. Where as Windows allow you to set user and even root account without password. A user can not run a program be it install/uninstall without permission provided (sudo) or root password.
But this is not the case with Windows, All windows program can be installed or uninstalled without the consent of root (Administrator). Could you run windows without GUI ? NO! But you can certainly run a Linux without GUI and it remains as much productive as it is with GUI. Actually most of the System Administrator disable GUI as a security concern.
Linux is so much secure in architecture that you even don’t need to go behind a firewall until you are on Network. The access control Security Policy in Linux that is called Security-Enhanced Linux (SELinux) is a set of Kernel modification and user-space tools which implement security policies in a Linux system. Even SELinux is not must for normal users however it is important for users on network and Administrators.
An Open Source Antivirus ‘Clam AV‘ is available for free download and you should install it, if your machine is on Network for comparatively more protection.
Download ClamAV from here: http://www.clamav.net Apart from these You can encrypt you disk, use a boot loader password, define and implement a custom boot, custom user roles, etc., makes Linux very much secure. However there are certain threats to Linux System and we will be discussing those here. The known Linux threats like Viruses, Trojans, Worms and Malware of other kind counts up to 422 in 2005 which gets more than doubled in the recent year with the current count of 863, as reported which is seen as a sign of increasing popularity of Linux as claimed by technical experts.
Some Know Linux Threats
* viruses
* Trojan horses
* Local Scripts
* Web Scripts
* Worms
* Targeted Attacks
* Rootkits, etc.
These days a new trend of cross platform viruses is getting common. Some of the measures one should implement, for Linux System protection:
* Protect bootloader
* Encrypt Disk
* check rootkits on regular basis
* Protect Root with strong Password
* Provide correct permission to files
* provide proper roles to users
* Implement SELinux
* Use Antivirus
* Go behind a Firewall
* Don’t keep un-necesarry packages and programs (It may result into security Flaw).
Using Linux sensibly is secure enough. Now the question arises if Linux is architecturally so much secure than Android which uses modified Linux Kernel for mobile devices has so much security flaws, Why? Well Android is developed in Java Programming Language and Java itself is known to have a number of security flaws. Moreover Android is very much in its child stage and will take some time to get matured. This article was aimed to provide you with the correct information while making you aware of prevalent misconception about Linux. That’s all for now . We will soon we coming with another interesting article related to Linux and FOSS Technologies.
Thursday, April 24, 2014
How to Switch Between The New Unity Lockscreen And LightDM In Ubuntu 14.04
To switch between LightDM and Unity for screen locking, firstly install CompizConfig Settings Manager (CCSM):
sudo apt-get install compizconfig-settings-manager
Then open CompizConfig Settings Manager, click on Ubuntu Unity Plugin and on the General tab, under "Lockscreen", you can select to use Unity, LightDM or no lockscreen: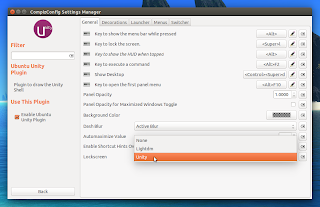
That's it - there's no need to restart the system or log out, the settings should be applied instantly.
sudo apt-get install compizconfig-settings-manager
Then open CompizConfig Settings Manager, click on Ubuntu Unity Plugin and on the General tab, under "Lockscreen", you can select to use Unity, LightDM or no lockscreen:

That's it - there's no need to restart the system or log out, the settings should be applied instantly.
Labels:
lightdm,
linux,
lockscreen,
ubuntu
Monday, March 24, 2014
Wallpaper Changer With Multi-Monitor Support `SyncWall` 2.0.0 Released, Available In PPA
SyncWall, a Qt wallpaper changer with multi-monitor support, was updated to version 2.0.0 recently and the new version is now available in the main WebUpd8 PPA for all supported Ubuntu versions.
SyncWall doesn't support downloading wallpapers automatically, like Variety Wallpaper Changer for instance, but it has some interesting features that aren't available in other similar apps (that I know of anyway): for instance, SyncWall can span a single wallpaper over multiple monitors (you can do this with a single wallpaper from the Appearance settings, but that doesn't work when using a wallpaper changer). Also, the application can synchronize your current wallpaper across your local network.
Here's a quick list of the most important SyncWall features:
* change wallpapers automatically / manually (optionally, this can be done via keyboard shortcuts); * multi-monitor support - for instance, it can span a single wallpaper over multiple monitors; * synchronize wallpaper between workstations; * configurable wallpaper change interval / time of day; * supports special effects for the wallpapers (blur, sharpen, desaturate, glow and so on); * several resizing methods and background filling; * available for Linux, Windows and Mac OS X; * should work with most Linux desktop environments: KDE 3/4, GNOME / GNOME 3 (includes Unity), Xfce, LXDE, Enlightenment, Openbox, Fluxbox, IceWM, Blackbox, WindowMaker and FVWM (it doesn't support Cinnamon and MATE though).
What's new in SyncWall 2.0 compared to the previous version available in the main WebUpd8 PPA:
* added option to start SyncWall automatically on Linux; * direct synchronization of wallpapers across network (sharing the same file is not used any more); * display name of current wallpaper in window header; * change layout for better handling on small screens (laptops); * global keyboard shortcuts to change wallpaper, open main interface or change image offset (you enable these in the SyncWall preferences); * images can now be rated - images with higher rating are displayed more often; * addition of a simple database backend for image data to speed up display; * addition of image alignment defined graphically by user (in order to display best part of images); * addition of an horizontal alignment parameter; * addition of several resampling methods; * updated app icons; * many bug fixes (for instance, the invisible tooltips bug should be fixed, among many others).
Please note that SyncWall tries to automatically detect the desktop environment, but this can fail sometimes. If the wallpaper doesn't change, manually select the desktop environment in the SyncWall Preferences, on the Startup tab. For Unity, select GNOME 3 as the DE. to span a single wallpaper across multiple monitors, in SyncWall select Preferences > Display Parameters and on the "Basic" tab, check the "Multi monitor support" box, then in the "Multi monitor" display drop-down, select "Extend image (one file for all monitors)":
Install SyncWall in Ubuntu
Ubuntu users can install SyncWall by using the main WebUpd8 PPA. Add the PPA and install SyncWall using the following commands:
sudo add-apt-repository ppa:nilarimogard/webupd8
sudo apt-get update
sudo apt-get install syncwall
Wednesday, March 19, 2014
ClassicMenu Indicator 0.9 Released With New Configuration Options
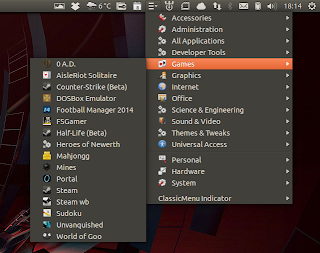
ClassicMenu Indicator is, like the name says, a classic, old GNOME style menu available as an AppIndicator so it can be used in Unity, as an alternative for those who dislike Dash, but it should also work in other desktop environments.
ClassicMenu Indicator 0.9 was released yesterday and comes with bug fixes as well as new options:
new configuration options available in the indicator menu:
* switch between the Ubuntu logo icon or the ClassicMenu indicator icon; * hide/show menu icons; * hide / show hidden items; * use alternate menu;
use desktop-specific menu if available (uses $XDG_MENU_PREFIX). This fixes the menu on e.g. Xubuntu.
Note: When changing some of the new configuration options, it will take a while until the changes are applied.
to install open terminal and enter these commands:
sudo add-apt-repository ppa:diesch/testing
sudo apt-get update
sudo apt-get install classicmenu-indicator
thats it.
Monday, March 17, 2014
Automate Tasks In Linux Using Actionaz, A Powerful Tool That Can Emulate Clicks, Key Presses And More [Updated]
Actionaz is task automation tool written in C++ / Qt, available for Linux and Windows. Using it, you can run repetitive tasks automatically, all without having to know any programming languages.
The tool can emulate mouse clicks or key presses, display message boxes, edit text files, download a file, play a sound, etc. For example, Actionaz can launch an application, perform some repetitive task and then close it, all automatically. Actionaz is somewhat similar to the popular Windows AutoHotkey or the Linux AutoKey tool, but it should be easier to use since you can create tasks from the GUI, without having to write the automation scripts yourself. However, advanced users can extend its functionality by using ECMAScript (JavaScript). Actions supported by Actionaz include: show a message box, move the cursor along a path, emulate mouse clicks or key presses, execute commands or start a process, kill a process, play a sound, open / download URL, show a notification, power options (restart, stop or suspend the system), find an image on the screen, read and write file content and many more.
install it via command line:
sudo apt-get install actionaz
Please note that the latest Actionaz version is not available in the Ubuntu / Debian repositories.
if you want to install the latest version, use the commands below:
sudo add-apt-repository ppa:nilarimogard/webupd8
sudo apt-get update
sudo apt-get install actionaz
Labels:
actionaz,
automation,
linux,
tasks,
ubuntu
Wednesday, March 12, 2014
Dukto LAN File Transfer Tool Is Easy To Use, Multi-Platform
Dukto R6 is an open source, multi-platform LAN file transfer tool, useful to transfer files form one computer to another without having to worry about configurations, operating systems, clients, servers and so on.
Dukto doesn't require any configuration: simply install it on the machines you want to transfer files from/to, launch the application and that's it. The application will automatically display all the computers in your local area network running Dukto and you can start transferring files.
By default, the files you receive are saved in your home folder but you can change that from the Dukto settings.
Besides being able to transfer files and folders on your LAN, Dukto also supports sending text snippets so for instance you can easily send a link from one computer to another in your LAN.
Officially, Dukto is available for Linux, Windows and Mac OS X but there are also some unofficial ports for iOS, Blackberry, Android or Maemo.
Dukto R6 features:
* supports sending and receiving files or folders as well as text snippets on your LAN;
* multi-platform;
* multi-transfer support;
* zero configuration;
* clients auto-discovery;
* transfers log;
* shows your IP addresses on the IP connection page;
* full Unicode support;
* Windows 7 taskbar integration with progress and transfer indicator;
* Metro style UI with configurable colors.
There is one issue with Dukto though: its security: the application doesn't use any passwords, no encryption, etc., so its developer recommends using it only on trusted local area networks.
Open Source Download Manager uGet Turns 11, Celebrates With New Release
You likely download tens, if not hundreds, of files from the web every week — from images, app installers and documents to videos, music and other media.
While most modern browsers are well equipped to handle the load, with some even offering basic management features like pausing and resuming downloads, some of you will prefer the advanced resources offered up by a dedicated desktop app.
The open-source download manager uGet is one of the most versatile download helpers available on Linux. It includes features for managing, queuing, organising and downloading files en-masse from a host of different sources, including FTP, HTTP and BitTorrent.
uGet’s latest release hit the download servers today, and adds additional actions to an already sizeable slate of features. Version 1.10.4 includes:
* Magnet Link Support * GnuTLS support * In-App Update Checker * “Message Banner” to deliver information on the project * Fixes for crashes when loading a large list of urls * Improved translations & language support
In addition to the release the project is also celebrating its 11th birthday — and I can’t think of a better way to celebrate than giving its latest release a whirl. Ubuntu users will find precompiled builds of the download assistant on the official project homepage, as well as links to further information.
Monday, March 10, 2014
how to install the mate desktop on ubuntu
Below we only show the latest LTS and the normal release. If you are using an other version of Ubuntu replace the name in “precise main” by one of quantal (12.10), raring (13.04). Example for raring would then be “raring main”.
Ubuntu Precise Pangolin (12.04 LTS) repository
Add ONE of the following repos to /etc/apt/sources.list via the following command:
sudo add-apt-repository "deb http://packages.mate-desktop.org/repo/ubuntu precise main"
sudo add-apt-repository "deb http://repo.mate-desktop.org/ubuntu precise main"
sudo add-apt-repository "deb http://mirror1.mate-desktop.org/ubuntu precise main"
Ubuntu Saucy Salamander (13.10) repository
Add ONE of the following repos to /etc/apt/sources.list via the following command:
sudo add-apt-repository "deb http://repo.mate-desktop.org/ubuntu saucy main"
sudo add-apt-repository "deb http://packages.mate-desktop.org/repo/ubuntu saucy main"
sudo add-apt-repository "deb http://mirror1.mate-desktop.org/ubuntu saucy main"
MATE Installation (Precise/Quantal/Raring/Saucy)
Then run the following command to update your repositories and install MATE:
sudo apt-get update
sudo apt-get --yes --quiet --allow-unauthenticated install mate-archive-keyring
sudo apt-get update
# this installs base packages
sudo apt-get install mate-core
# this installs more packages
sudo apt-get install mate-desktop-environment
thats it log out or restart your computer and select mate at the login screen when logging in and your set.
Saturday, March 8, 2014
Customizing Your Bash Prompt
In this tutorial I will show you how you can change the look and behavior of the prompt to show more details or use a different coloring style. I will explain how to try all these examples and how to make changes permanently by adding them inside the Bash configuration file. Please note that this stuff is Bash-specific and it won't work in other shells.
Introduction
By default, the prompt may look something like this:
And the command to set such a prompt would be:
PS1='\[\033[0;31m\]$(returncode)\[\033[0;37m\]\[\033[0;35m\]${debian_chroot:+($debian_chroot)}\[\033[01;31m\]\h\[\033[01;34m\] \W \$\[\033[00m\] '
In this tutorial I'll try to explain what all these strange characters do by starting with basic examples and going from there. To try the commands in this tutorial, type them in your terminal. If you want to make changes permanently, put the desired line inside the $HOME/.bashrc file.
The $HOME/.bashrc File
To set the prompt permanently instead of only the current session you will have to copy the respective commands inside the $HOME/.bashrc file, which is executed by Bash every time it starts an interactive session.
The $PS1 and $PS2 Environment Variables
PS stands for INS. The $PS1 variable is the one holding the prompt format. The $PS2 variable is used for multi-line commands, and it is usually set to the greater than character (>):
Changing the Look of Your Prompt
Let's start with the simplest example:
export PS1="$ "
As simple as that, your prompt will always look like this:
Now let's add the current user and the machine hostname. We can do this in two ways, both having the same result. Here's the first:
export PS1="$USER@$HOSTNAME$ "
In this case we use the environment variables $USER and $HOSTNAME, which will be expanded into their actual values. The second way would be:
export PS1="\u@\h\\$ "
Here we use the \u escaped character for the user and \h for the hostname, and \\$ which will expand into either $ or # depending on whether you are a normal user or root. Now let's also include the current path:
export PS1="$USER@$HOSTNAME:\w\\$ "
We used \w for the current working directory.
Colors
So now that we know how to change the information our prompt will show us, let's see how we can use colors to customize it. As an example, here is the code for the prompt that I use:
export PS1="\[\033[01;33m\][$USER@$HOSTNAME]\[\033[0;00m\] \[\033[01;32m\]\w$\[\033[0;00m\] "
It looks like this:
Bash uses colored codes for various colors, for example \033[01;32m for foreground green, \033[01;34m for foreground blue or \033[01;41m for background red. You can try various colors by typing in a terminal something like PS1="\033[01;35m$USER@HOST$ ". Notice at the end the code to reset the color formatting after the prompt, so that the commands introduced by the user will be in the default color rather than the prompt color. This code is \[\033[0;00m\].
Additionally, you can create variables inside .bashrc which will hold these codes:
export FGGR="\[\033[01;32m\]" // foreground green export BGRE="\[\033[01;41m\]" // background red # ...
You can now use these variables inside the prompt customization string.
More Examples
I provide some examples on configuring your prompt, along with screenshots for each of them.
Example #1
PS1='\e[1;33;47m\u \e[1;32;47mon \h \e[1;35;47m\d \@\e[0;0m\n\e[1;34m[dir.= \w] \# > \e[0;0m'
Tuesday, February 18, 2014
Tomahawk 0.7 Released – A Ultimate Social Music Player for Linux
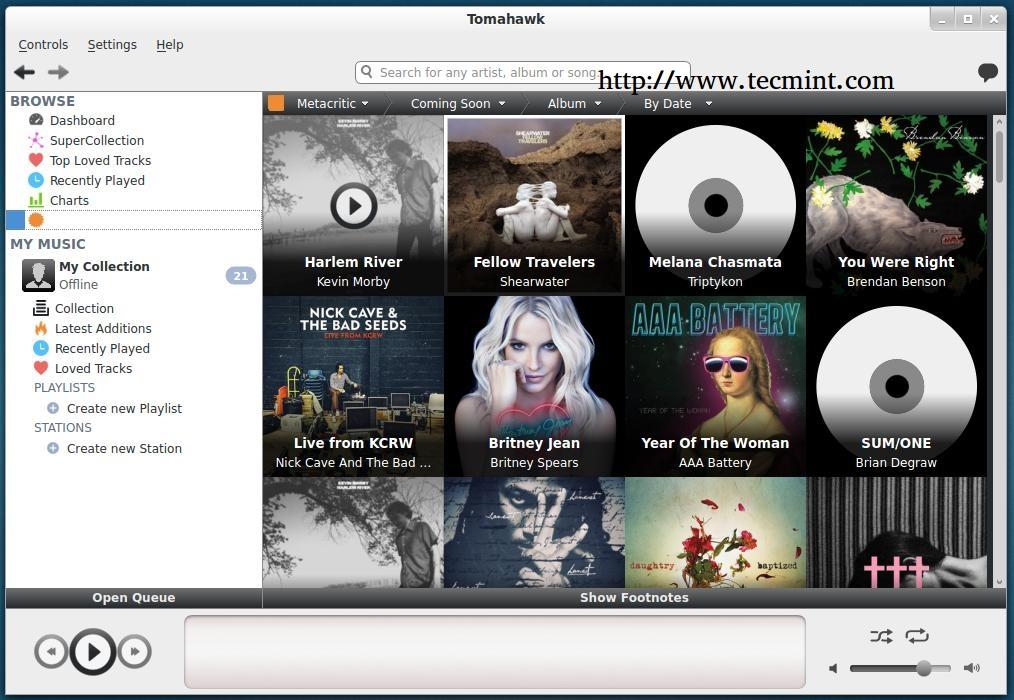
Tomahawk is a ultimate, open source and next-generation cross platform social music player that allows you to access music stored on your hard-drive (as any self-respecting music player does), but it also taps a wide variety of music sources such as SoundCloud, Spotify, Youtube and other music subscription services to organize everything at one place. This fundamentally turns the entire internet into one music library. From there, you can share your playlists, search for media on a variety of services at once.
Tomahawk also connects you with the other computers and friends on the network to share, view and stream your music libraries/radio stations via Google Chat, Jabber and Twitter. So, basically you don’t need to worry about going through other players or signing up for new things. It combines all varied music services and social networking in an easy to use, user-friendly interface.
Tomahawk Features
* Multi-Source: Plug in content resolvers for all your personal music subscription services, networked libraries, promotion platforms, online data lockers and more. * Social: Connect to your other computers and friends via Google Chat, Twitter and Jabber. Share, Browse and Play their music libraries, playlists and stations. * Smart: Tomahawk has the knobs, dials and feeds to catch the latest charts, upcoming new releases and create custom radio stations for you.
Install Tomahawk 0.7 in Ubuntu/Linux Mint and Fedora
We use Tomahawk PPA to install latest version under Ubuntu 12.10, 12.04, 11.10, 11.04 and Linux Mint 16, 15, 14, 13. Press ‘Ctrl+Alt+T‘ on your keyboard to open terminal and add ‘ppa:tomahawk/ppa‘ to your sources, update and install.
On Ubuntu/Linux Mint
sudo add-apt-repository ppa:tomahawk/ppa sudo apt-get update sudo apt-get install tomahawk
On Fedora
Fedora user’s don’t need to add any repository, its by default available in fedora repository.
yum install tomahawk
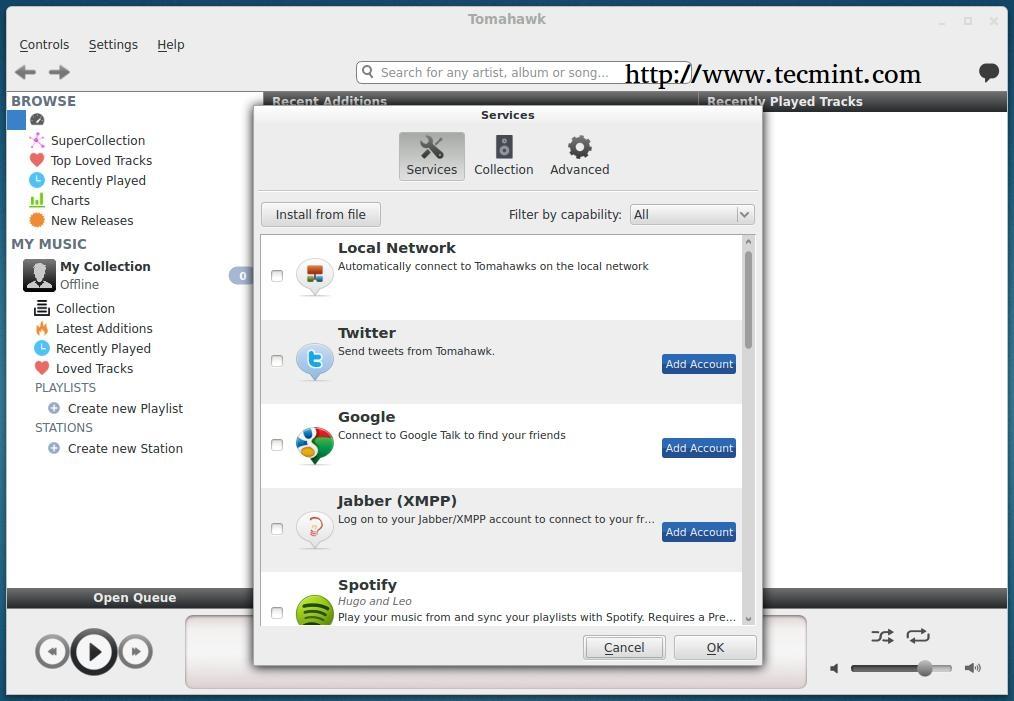
Note: The fedora repository contains Tomahawk 0.6 version, if you’re looking for a latest version (i.e. 0.7) you need to compile it from source tarball. Once it’s installed, you’re asked to add your Jabber, Twitter and Google accounts to find your friends, tweets and more. There are lot more other services like Spotify, SoundCloud, Last.fm, Grooveshark, etc. where you can sync your playlist to Tomahawk music library.
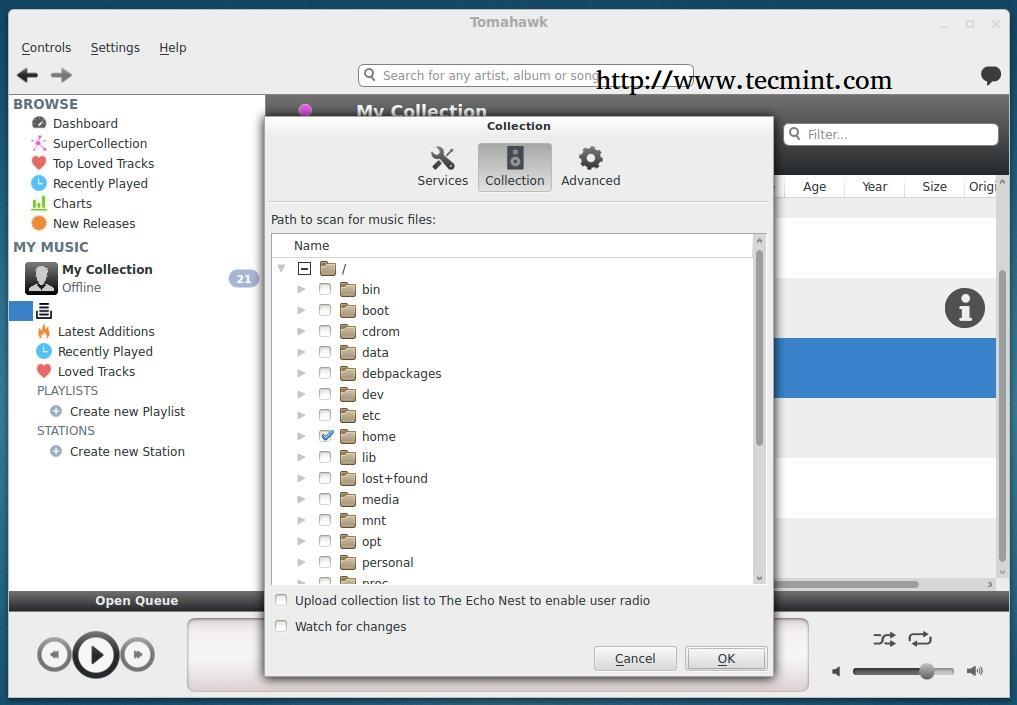
Next, click on ‘Collection‘ tab and point to your music folder on your file system. Do that, and wait for a few minutes to scan your music files.
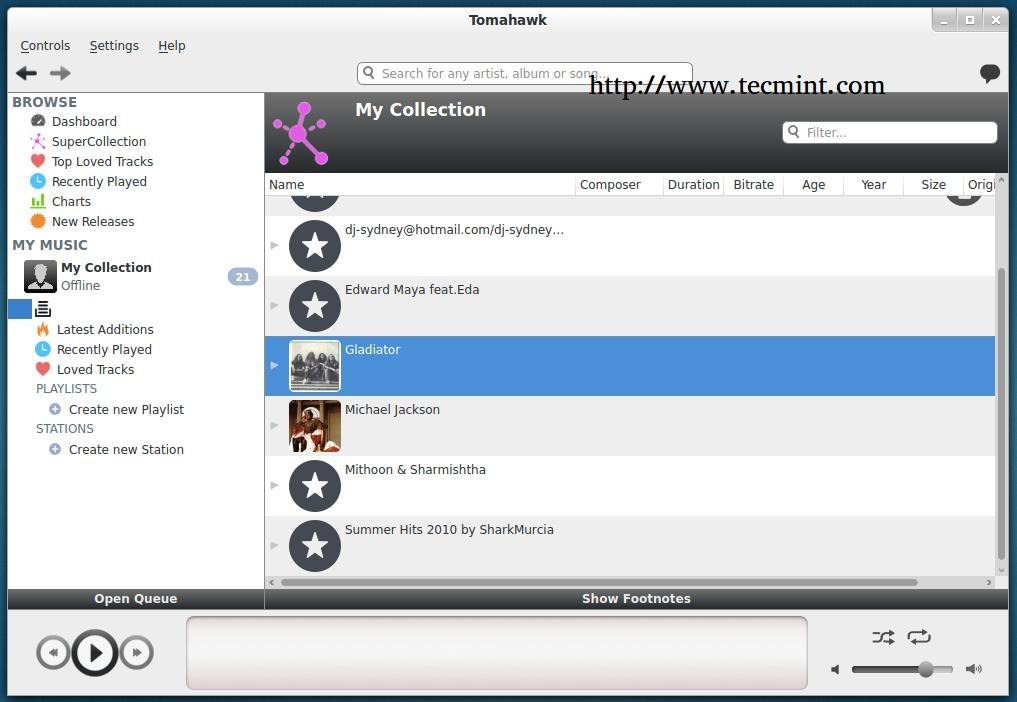
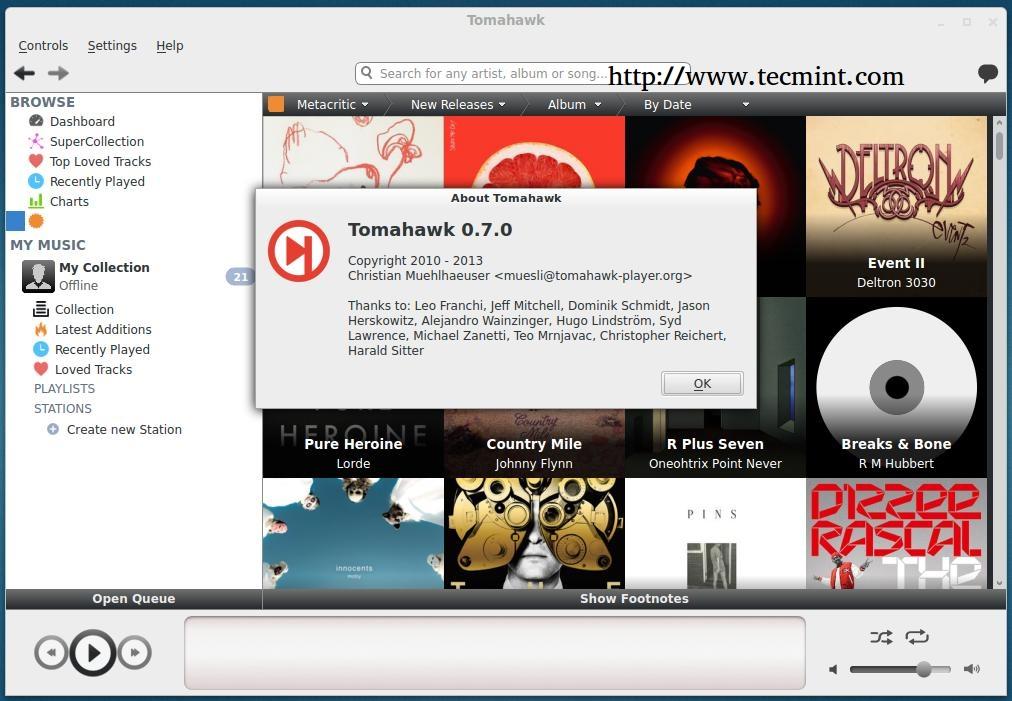
Some Tomahawk Screenshots
Tomahawk is a good choice, if you’re looking for the next generation of music players. It is still a young application with lots of areas its creators need to competence, but that ability will continue to come with each new release.
Aptik - A Tool to Backup/Restore Your Favourite PPAs and Apps in Ubuntu
As we all know that Ubuntu has a six month release cycle for new version. All the PPAs and Packages of your choice also needs to be re-added, to avoid doing those stuffs and save your time, here we bringing a fantastic tool called ‘Aptik‘.
Aptik (Automated Package Backup and Restore) is a GUI application that lets you backup your favourite PPAs and Packages. It is very difficult to remember to which packages are installed and from where it has been installed them. We can take backup and restore of all the PPAs before re-installation or up-gradation of OS.
Aptik is a open source package that simplify backup and restore of PPAs, Applications and Packages after a fresh installation or upgradation of Debian based Ubuntu, Linux Mint and other Ubuntu derivatives.
Features of Aptik
* Custom PPAs and the Apps * Backup Themes and icons * Backup applications installed via APT cache * Apps installed from Ubuntu Software Centre * Aptik command-line options
How to Backup PPA’s and Packages on Old Systems
By default Aptik tool is not available under Ubuntu Software Centre, you need to use PPA to install it. Add the following PPA to your system and update the local repository and install package as shown.
Installation of Aptik
sudo apt-add-repository -y ppa:teejee2008/ppa sudo apt-get update sudo apt-get install aptik
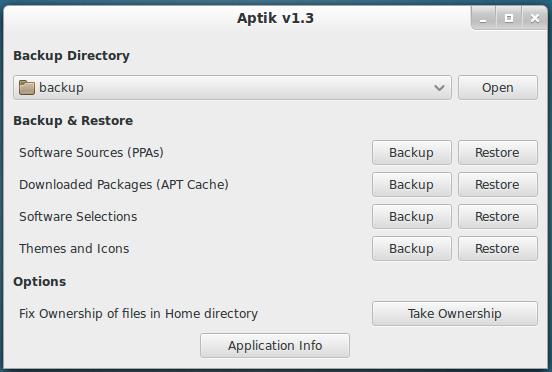
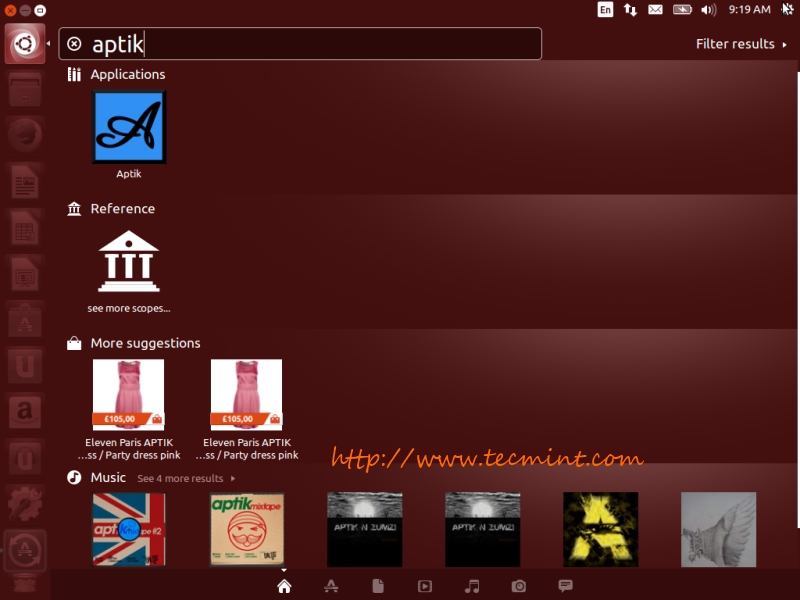
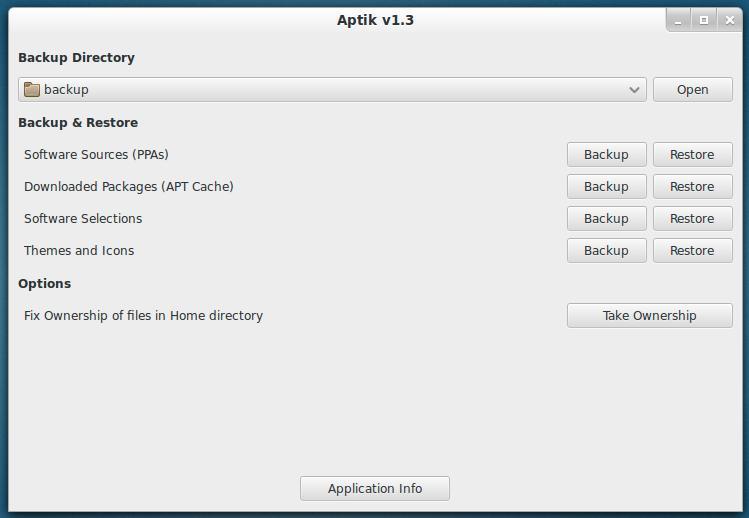
Start ‘Aptik‘ from the applications menu.
Create Backup Directory
Create or Select a backup directory to store your all sections to re-use on your new install.
/br> Backup Software Sources
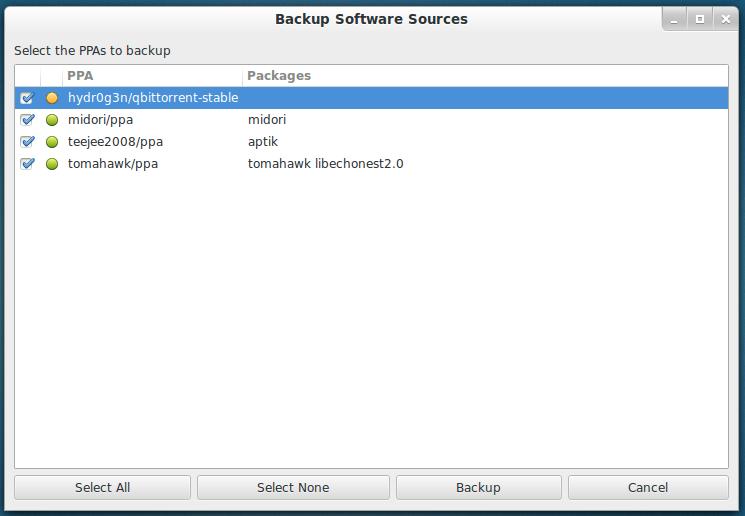
Click the ‘Backup‘ button for Software Sources. A list of installed third-party PPAs will be displayed along with their Packages names that are installed from the PPA.
Note: PPAs with a green icon indicates as active and have some packages installed. Whereas yellow icon indicates as active but no packages installed. Select your favourite PPAs and click on the ‘Backup‘ button to create backup. All PPAs will be stored in a file called ‘ppa.list‘ in the selected backup directory.
Backup Downloaded Packages (APT Cache)
Click the ‘Backup‘ button to copy all the downloaded packages to backup folder.
Note: All the downloaded packages stored under your ‘/var/cache/apt/archives‘ folder will be copied to the backup folder. This step is only useful if you are re-installing the same version of Linux distribution. This step can be skipped for upgradation of system, since all the packages for the new release will be latest than the packages in the system cache.
Backup Software Selections
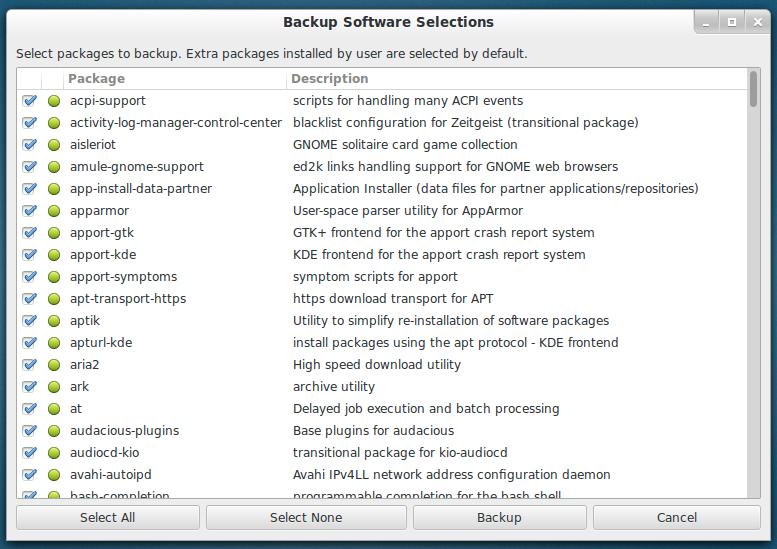
Clicking the ‘Backup‘ button will show a list of all installed top-level packages.
Note: By default all the packages installed by Linux distribution are un-selected, because those packages are the part of Linux distribution. If required those packages can be selected for backup. By default all extra packages installed by the user marked as selected, because those packages are installed via Software Centre or by running apt-get install command. If required those can be un-selected. Select your favourite packages to backup and click the ‘Backup‘ button. A file named ‘packages.list‘ will be created under the backup directory.
Backup Backup Themes and Icons
Click the ‘Backup‘ button to list all the installed themes and icons from the ‘/usr/share/themes‘ and ‘/usr/share/icons‘ directories. Next, select your themes and click on the ‘Backup‘ button to backup.
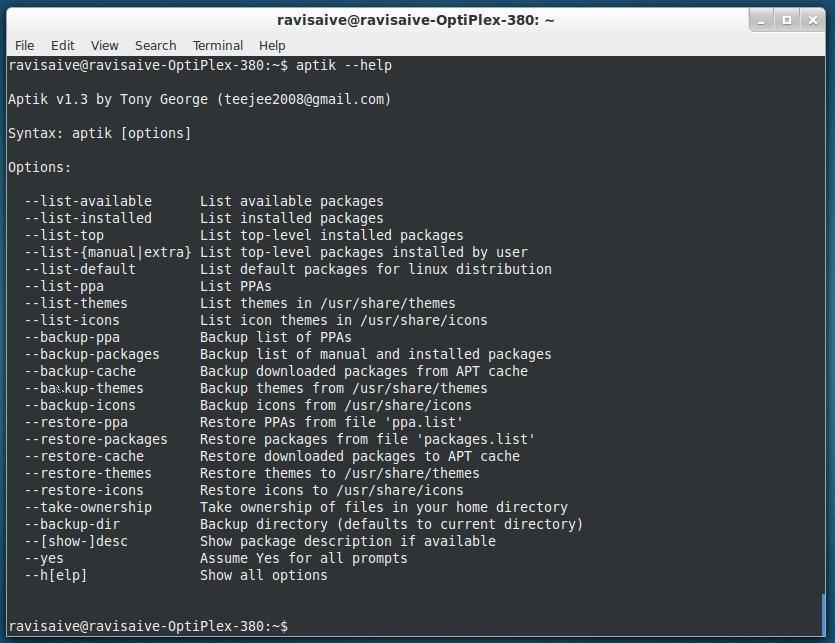
Aptik Command-line Otions
Run ‘aptik –help’ on the terminal to see the full list of available options.
To restore those backups, you will need to install Aptik from its own PPA on the newly installed system. After this, hit the ‘Restore’ button to restore all your PPAs Packages, Themes and Icons to your freshly installed system.
Conclusion
You may be wondering why such cool stuff is not by default available on Ubuntu? Ubuntu does it via ‘Ubuntu One‘ and that too paid apps. What do you think about this tool? Share you views through our comment section.


