Tuesday, April 30, 2013
Microsoft Ask Ubuntu To Remove Skype Icon From System
Microsoft have ‘requested’ that Ubuntu remove a Skype icon from a package in Unity on Ubuntu.
As a trademarked asset approval is required from Microsoft for its use and distribution.
A fixed version of the Unity-asset-pool package has since been uploaded to Ubuntu 12.10 and 13.04.
But Ubuntu isn’t alone. Various packages for other flavours, including Lubuntu, Kubuntu & Ubuntu Kylin, have also been updated to remove sly Skype icons, many of which were included but never actually used – even if Skype was installed.
As such this removal is harmless. You’ll still be able to install Skype as normal and Skype will continue to show an icon on the Unity desktop.
Sunday, April 28, 2013
7 Things To Do After Installing Ubuntu 13.04 (Raring Ringtail)
1. Tweak Unity.
Unity Tweak Tool is a pretty new application that's available in the Ubuntu 13.04 repositories, which you can use to tweak Unity: change various aspects of the Unity interface such as auto-hide behavior, change the Unity Launcher icons size, color, and more, set up hotcorners, tweak the Dash search, change the GTK, icon theme or fonts and much more.
use the following command in a terminal to install it:
sudo apt-get install unity-tweak-tool
If you use GNOME Shell, install GNOME Tweak Tool instead.
2. Privacy settings.
By default, Dash may display private files but there's an easy way to prevent this: open System Settings > Privacy and here, you can: * delete recent history * blacklist applications or folders / partitions from showing up in Dash Here, you can also set Dash not to include online search results. This will disable the controversial Shopping Lens along with the other online searches performed by the Friends lens or the Photo lens.
If you don't want the Shopping Lens but want to be able to use the other online scopes / lenses, you can simply uninstall the Shopping Lens:
sudo apt-get remove unity-lens-shopping
And finally, if you constantly change the privacy settings (e.g.: often disable Zeitgeist logging; Zeitgeist is used to log the files that show up in Dash), you can use Privacy Indicator which lets you clear the Zeitgeist (and thus, Dash) logs, clear the recent files list (which shows up in the Nautilus "Recent" sidebar item for example), and quickly enable/disable Zeitgeist logging or the online search results.
To install Privacy Indicator in Ubuntu 13.04, use the following commands:
sudo add-apt-repository ppa:diesch/testing sudo apt-get update sudo apt-get install indicator-privacy
3. Solution for popular missing features: weather and calendar indicators.
Two features that Ubuntu lacks in my opinion are weather and calendar indicators. Hopefully, the Ubuntu developers will have some time to fulfill these popular feature requests soon, but until then we can use some third-party indicators that work great. There's a weather indicator available in the official Ubuntu 13.04 repositories / Ubuntu Software Center, but it doesn't work properly so we'll use My Weather Indicator instead. To install it in Ubuntu 13.04, use the following commands:
sudo add-apt-repository ppa:atareao/atareao sudo apt-get update sudo apt-get install my-weather-indicator
My Weather indicator supports OpenWeatherMap and Yahoo weather services out of the box and you can also use Wunderground or World Weather Online if you sign up to get your own API
Besides a cool indicator that gives you quick access to the current weather, weather forecast and a forecast map, the application also comes with (optional) desktop widgets:
Another feature that, at least in my opinion, Ubuntu lacks, is a proper calendar. I use Google Calendar and if you use it too, you'll love Google Calendar Indicator, an application that can be used to easily add new Google Calendar events, display your current events with notifications, browse your calendars and so on.
Install Google Calendar Indicator using the following commands:
sudo add-apt-repository ppa:atareao/atareao sudo apt-get update sudo apt-get install calendar-indicator
4. Improve battery life, other important tweaks
Jupiter used to be one of the first things to install after a fresh Ubuntu installation, but unfortunately the application has been discontinued and the old version doesn't work properly in Ubuntu 13.04. But, if battery life is what you're interested in, you can use TLP, a tool that you install and then forget about it because it automatically tweaks your system for better power usage / battery life. To install TLP in Ubuntu 13.04, use the following commands:
sudo add-apt-repository ppa:linrunner/tlp sudo apt-get update sudo apt-get install tlp tlp-rdw sudo tlp start
If you're using an Nvidia Optimus laptop, also install Bumblebee or else both graphics cards will be powered on all the time, even though the Nvidia graphics card isn't used:
sudo add-apt-repository ppa:bumblebee/stable sudo apt-get update sudo apt-get install bumblebee bumblebee-nvidia
Currently, there's a bug with Bumblebee 3.1 and Ubuntu 13.04 (and version 3.2 which fixes this has been released a couple of days ago, but then removed from the PPA because it has a nasty bug and doesn't work at all in Raring, no fix has been found yet) and trying to use "optirun", you'll get an error similar to the one below:
[ 28.507128] [ERROR]Cannot access secondary GPU - error: [XORG] (EE) No devices detected. [ 28.507158] [ERROR]Aborting because fallback start is disabled.
So to get Bumblebee to work in Ubuntu 13.04 Raring Ringtail, do the following: a) Run the following command to find out the BusID for your Nvidia graphics card:
lspci | grep NVIDIA
The BusID is the number in the beginning of the line returned by the command above. Here's how the output for the command above looks like on my laptop:
01:00.0 VGA compatible controller: NVIDIA Corporation GF116M [GeForce GT 555M/635M] (rev a1)
The BusID is the number in bold, "01:00.0" in my case. b) Now we'll have to add the BusID to /etc/bumblebee/xorg.conf.nvidia and for this, we'll open the file as root with a text editor (I'll use Gedit in the command below):
gksu gksu gedit /etc/bumblebee/xorg.conf.nvidia
("gksu" is used twice intentionally so that Gedit doesn't open a blank tab next to our file) And in this file, in the "Device" section, add the following:
BusID "PCI:YOUR_BUS_ID"
Replacing "YOUR_BUS_ID" with the BusID returned by the command used under step a). For me (remember, for you, the BusID may be different), this line looks like this:
BusID "PCI:01:00:0"
Then, restart your system and Bumblebee should work so when you want to run an application or game on your Nvidia card, use:
optirun APP_OR_GAME
Where "APP_OR_GAME" is the game or application executable. To test the performance with Bumblebee, use:
optirun glxspheres
If it still doesn't work, try restarting your system and make sure you've correctly configured Bumblebee to use the installed Nvidia drivers (you can use Bumblebee Configurator GUI for this).
This doesn't have anything to do with battery life is an important tweak nevertheless: if you're using a SSD, it's pretty important to enable TRIM so its performance doesn't decrease over time.
5. Fix Google Chrome, Skype.
Google Chrome has a bug and can't be installed on fresh Ubuntu 13.04 installations. The bug currently affects Google Chrome Stable and Beta (has already been fixed in Google Chrome Dev) and until Google fixes it (it's not an Ubuntu bug)
Skype currently crashes on start for Ubuntu 13.04 users that have installed the proprietary Nvidia drivers. The bug also affects some AMD / ATI proprietary graphics drivers users and some of them have reported that the fix below works for them too. To fix this issue with proprietary Nvidia drivers (and possibly AMD) and Skype, use the following command:
sudo sed -i 's/^Exec=skype.*/Exec=bash -c "export LD_PRELOAD=\/usr\/lib\/i386-linux-gnu\/mesa\/libGL\.so\.1 \&\& skype %U"/' /usr/share/applications/skype.desktop
In case you want to revert the change made by the command above, use the following command:
sudo sed -i 's/^Exec=bash.*/Exec=skype %U/' /usr/share/applications/skype.desktop
6. Migrate / upgrade PPAs (advanced users)
If you've upgraded from Ubuntu 12.10 to Ubuntu 13.04, all your PPAs were disabled in the process. Ubuntu 13.04 already has the latest version for most packages, but there are some that aren't the latest version or you may want to install some applications that aren't available in the official repositories / Ubuntu Software Center. Y PPA Manager can help you with this: it can automatically re-enable the PPAs that work with Ubuntu 13.04, leaving the others disabled. For this, open Y PPA Manager (installation instructions below) and under "Advanced", select "Re-enable working PPAs after Ubuntu upgrade" and wait until Y PPA Manager scans all your PPAs, checks if they work with Ubuntu 13.04 and if they do, it enables them. We have a tip for fresh installs too regarding this: if you've backed up the PPAs you had on an older Ubuntu version (e.g. using Y PPA Manager), you can restore the backup in Ubuntu 13.04 and use Y PPA Manager to update the PPAs to Ubuntu 13.04, but only for the PPAs that actually work on Ubuntu 13.04, leaving the others as they are so you don't get any 404 errors. To do this, in Y PPA Manager > Advanced, select "Update release name in working PPAs", under "Current Ubuntu version" enter: "raring" (without the quotes) and under "Previous Ubuntu version" enter the Ubuntu version from which you've copied the PPAs from (e.g.: quantal), then click OK and wait for the application to scan all your PPAs and upgrade to Raring those that support it. To install Y PPA Manager, use the following commands:
sudo add-apt-repository ppa:webupd8team/y-ppa-manager sudo apt-get update sudo apt-get install y-ppa-manager
7. Install codecs, Java.
To be able to play most audio and video formats, install Ubuntu Restricted Extras by using the following command:
sudo apt-get install ubuntu-restricted-extras
I suggest to also install the unrestricted versions of libavformat and libavcodec so you don't encounter issues with missing codecs when trying to use some video editors or transcoders - install them by using the following command:
sudo apt-get install libavformat-extra-53 libavcodec-extra-53
You may also need Java, but you must figure out what you need. Most users will only need OpenJRE and the Java browser plugin which you can install by using the following command:
sudo apt-get install icedtea-7-plugin openjdk-7-jre
Now it's your turn. What are the first things you install or tweak after installing Ubuntu?
Friday, April 26, 2013
Wednesday, April 24, 2013
Tuesday, April 23, 2013
Ubuntu Button Tweaked to Meet ‘Cultural & Aesthetic’ Expectations
The Ubuntu button in 13.04 has received a last minute change: the background swirl now spins in a clockwise direction.
Why The Change? But why has the background direction been altered? And why now? We don’t need to go too far back in history to answer the latter question, just to yesterday when a bug report was filed by Matthieu James, Ubuntu’s icon maker. In the issue he cites a mail forwarded to him by Mark Shuttleworth in which a user argues that the button background swirl should spin clockwise, as there are cultural and historical dispositions favouring this procession. Still following? Good. Now, there is certainly no denying that, for most cultures, the clockwise/right-leaning movement is seen as being ‘good’, ‘positive’, and, in some cases, ‘holy’. Whether it makes sense to us today is moot; the fact is that the vast majority of us are socialised to believe that clockwise = moving forward and moving forward = good. It sits within in us at a subconscious level, handed down to us from ancient times when the movement of the sun in the sky ( ‘east’ to ‘west’) was revered as important, life-giving and divine. ‘Sunwise’ became shorthand for ‘the right way’. Shorthand that remained core through subsequent cultures and civilisations; a crutch that influenced architecture, mathematics, science, mechanics. The procession of clockwise over anti-clockwise is a movement we’re just darn well used to. Even some of our words, like ‘sinister’ are hold overs from this, being derived from the latin for anti-clockwise ‘sinistro‘! ‘iron age thinking’ Back to the present. The BFB icon in 13.04 has now been changed (albeit committed to Unity but not yet landed) to conform to this cultural/historical expectation. This hasn’t pleased everyone, especially Steve Riley who writes: “The notion that left = bad and right = good is steeped in ancient (and wrong) beliefs about what nature prefers. It’s the 21st century now. Do people really make technology decisions based on iron age fairy tales?” He wasn’t alone in feeling a little peeved. The Ubuntu Documentation team, who have already taken screenshots of Ubuntu 13.04, also felt a bit put out. And Kevin Godby raised the point of whether this change means other anti-clockwise-leaning icons will also be hanged, like the new Software Updater icon. Ultimately it’s a change that is both trivial and, to those who don’t care about such inferences, an irrelevant one at that. But for designers, who speak a language that’s heavily based on symbolism, the change of direction will be seen a touch of finesse aimed at reassuring the subconscious eye with a familiar shapes, patterns and flows. And that, cultural reasonings aside, is the most important thing: making sure it looks good.

Why The Change? But why has the background direction been altered? And why now? We don’t need to go too far back in history to answer the latter question, just to yesterday when a bug report was filed by Matthieu James, Ubuntu’s icon maker. In the issue he cites a mail forwarded to him by Mark Shuttleworth in which a user argues that the button background swirl should spin clockwise, as there are cultural and historical dispositions favouring this procession. Still following? Good. Now, there is certainly no denying that, for most cultures, the clockwise/right-leaning movement is seen as being ‘good’, ‘positive’, and, in some cases, ‘holy’. Whether it makes sense to us today is moot; the fact is that the vast majority of us are socialised to believe that clockwise = moving forward and moving forward = good. It sits within in us at a subconscious level, handed down to us from ancient times when the movement of the sun in the sky ( ‘east’ to ‘west’) was revered as important, life-giving and divine. ‘Sunwise’ became shorthand for ‘the right way’. Shorthand that remained core through subsequent cultures and civilisations; a crutch that influenced architecture, mathematics, science, mechanics. The procession of clockwise over anti-clockwise is a movement we’re just darn well used to. Even some of our words, like ‘sinister’ are hold overs from this, being derived from the latin for anti-clockwise ‘sinistro‘! ‘iron age thinking’ Back to the present. The BFB icon in 13.04 has now been changed (albeit committed to Unity but not yet landed) to conform to this cultural/historical expectation. This hasn’t pleased everyone, especially Steve Riley who writes: “The notion that left = bad and right = good is steeped in ancient (and wrong) beliefs about what nature prefers. It’s the 21st century now. Do people really make technology decisions based on iron age fairy tales?” He wasn’t alone in feeling a little peeved. The Ubuntu Documentation team, who have already taken screenshots of Ubuntu 13.04, also felt a bit put out. And Kevin Godby raised the point of whether this change means other anti-clockwise-leaning icons will also be hanged, like the new Software Updater icon. Ultimately it’s a change that is both trivial and, to those who don’t care about such inferences, an irrelevant one at that. But for designers, who speak a language that’s heavily based on symbolism, the change of direction will be seen a touch of finesse aimed at reassuring the subconscious eye with a familiar shapes, patterns and flows. And that, cultural reasonings aside, is the most important thing: making sure it looks good.
Master PDF Editor available via Ubuntu Software Center in Ubuntu 12.10 and Ubuntu 13.04
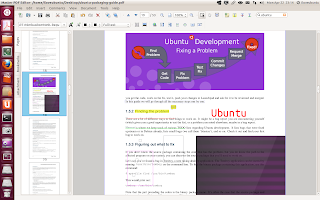
Master PDF Editor is a powerful full-of-features PDF and XPS editing tool, presenting itself as a handy, highly-usable editor for PDF files (documents, large books, etc) with numerous functionalities.
Master PDF Editor met Ubuntu months and months ago, landing in Ubuntu 12.04, moreover, gaining new and new features and polished aligned-with-the-desktop look & feel.
Master PDF Editor 1.8.20 is presently available for both Ubuntu 12.10 and Ubuntu 13.04, covering all Ubuntu relevant releases, including the upcoming Ubuntu 13.04.
Master PDF Editor 1.8.20 comes with an impressive amount of features, such as:
* ability to insert images, text, links, edit boxes, check boxes, radio buttons, combo boxes, list boxes, buttons * option to highlight, strikeout and underline text (both words and sentences,--text pieces--) * create from-scratch new PDF file capability * inside-the-PDF-file sticky-notes addition * hassle-free page management with page deletion and page insertion * support for exporting PDF files as images (BMP, PNG, JPEG, TIFF) via Master PDF Editor-->File-->Export to-->Images (action that exports PDF files page-by-page as images, thus generating 100 images for a 100 page PDF book)
A definitely interesting aspect of Master PDF Editor is its manner of editing files, meaning, the user is able to significantly tweak PDF files utilizing the toolbar's buttons and intuitive mouse pointer-based actions, thus (for example) adding a yellow highlight to a text piece is seconds-away. Master PDF Editor 1.8.20 is available for free via Ubuntu Software Center (Ubuntu 12.10, Ubuntu 13.04).
Thursday, April 18, 2013
task-spooler – Personal job scheduler
task spooler is a Unix batch system where the tasks spooled run one after the other. The amount of jobs to run at once can be set at any time. Each user in each system has his own job queue. The tasks are run in the correct context (that of enqueue) from any shell/process, and its output/results can be easily watched. It is very useful when you know that your commands depend on a lot of RAM, a lot of disk use, give a lot of output, or for whatever reason it's better not to run them all at the same time, while you want to keep your resources busy for maximum benfit. Its interface allows using it easily in scripts.
Features
Queue jobs from different terminals. Use it locally in my machine (not as in network queues). Have a good way of seeing the output of the processes (tail, errorlevels, ...). Easy use: almost no configuration. Easy to use in scripts. It works in most systems I use and some others, like GNU/Linux, Darwin, Cygwin, and FreeBSD. No configuration at all for a simple queue. Good integration with renice, kill, etc. (through `ts -p` and process groups). Have any amount of queues identified by name, writting a simple wrapper script for each (I use ts2, tsio, tsprint, etc). Control how many jobs may run at once in any queue (taking profit of multicores). It never removes the result files, so they can be reached even after we've lost the ts task list. Transparent if used as a subprogram with -nf. Optional separation of stdout and stderr.
Install task-spooler in ubuntu
Open the terminal and run the following command
sudo apt-get install task-spooler
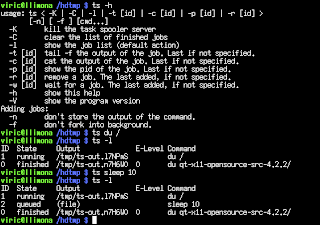
Using task-spooler
ts [action] [-ngfmd] [-L ] [cmd...]
Env vars: TS_SOCKET the path to the unix socket used by the ts command. TS_MAILTO where to mail the result (on -m). Local user by default. TS_MAXFINISHED maximum finished jobs in the queue. TS_ONFINISH binary called on job end (passes jobid, error, outfile, command). TS_ENV command called on enqueue. Its output determines the job information. TS_SAVELIST filename which will store the list, if the server dies. TS_SLOTS amount of jobs which can run at once, read on server start. Actions: -K kill the task spooler server -C clear the list of finished jobs -l show the job list (default action) -S [num] set the number of max simultanious jobs of the server. -t [id] tail -f the output of the job. Last run if not specified. -c [id] cat the output of the job. Last run if not specified. -p [id] show the pid of the job. Last run if not specified. -o [id] show the output file. Of last job run, if not specified. -i [id] show job information. Of last job run, if not specified. -s [id] show the job state. Of the last added, if not specified. -r [id] remove a job. The last added, if not specified. -w [id] wait for a job. The last added, if not specified. -u [id] put that job first. The last added, if not specified. -U swap two jobs in the queue. -h show this help -V show the program version Options adding jobs: -n don't store the output of the command. -g gzip the stored output (if not -n). -f don't fork into background. -m send the output by e-mail (uses sendmail). -d the job will be run only if the job before ends well -L name this task with a label, to be distinguished on listing.
Features
Queue jobs from different terminals. Use it locally in my machine (not as in network queues). Have a good way of seeing the output of the processes (tail, errorlevels, ...). Easy use: almost no configuration. Easy to use in scripts. It works in most systems I use and some others, like GNU/Linux, Darwin, Cygwin, and FreeBSD. No configuration at all for a simple queue. Good integration with renice, kill, etc. (through `ts -p` and process groups). Have any amount of queues identified by name, writting a simple wrapper script for each (I use ts2, tsio, tsprint, etc). Control how many jobs may run at once in any queue (taking profit of multicores). It never removes the result files, so they can be reached even after we've lost the ts task list. Transparent if used as a subprogram with -nf. Optional separation of stdout and stderr.
Install task-spooler in ubuntu
Open the terminal and run the following command
sudo apt-get install task-spooler
Using task-spooler
ts [action] [-ngfmd] [-L ] [cmd...]
Env vars: TS_SOCKET the path to the unix socket used by the ts command. TS_MAILTO where to mail the result (on -m). Local user by default. TS_MAXFINISHED maximum finished jobs in the queue. TS_ONFINISH binary called on job end (passes jobid, error, outfile, command). TS_ENV command called on enqueue. Its output determines the job information. TS_SAVELIST filename which will store the list, if the server dies. TS_SLOTS amount of jobs which can run at once, read on server start. Actions: -K kill the task spooler server -C clear the list of finished jobs -l show the job list (default action) -S [num] set the number of max simultanious jobs of the server. -t [id] tail -f the output of the job. Last run if not specified. -c [id] cat the output of the job. Last run if not specified. -p [id] show the pid of the job. Last run if not specified. -o [id] show the output file. Of last job run, if not specified. -i [id] show job information. Of last job run, if not specified. -s [id] show the job state. Of the last added, if not specified. -r [id] remove a job. The last added, if not specified. -w [id] wait for a job. The last added, if not specified. -u [id] put that job first. The last added, if not specified. -U swap two jobs in the queue. -h show this help -V show the program version Options adding jobs: -n don't store the output of the command. -g gzip the stored output (if not -n). -f don't fork into background. -m send the output by e-mail (uses sendmail). -d the job will be run only if the job before ends well -L name this task with a label, to be distinguished on listing.

Wednesday, April 17, 2013
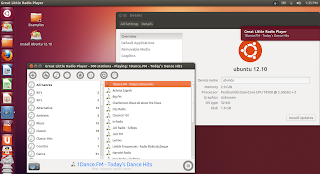
Great Little Radio Player
A robust internet radio station streamer for Ubuntu and Fedora based Linux distributions. It connects to web sites offering radio streaming and lets you play radio stations directly from that locations. With Great Little Radio Player, you will have collection of 300 radio stations worldwide. Best part, it's free of charge.
What you should know about working with this player
The internet radio station collection is large, but that is not the most important thing with a program like this. You can have a lot of fun using Great Little Radio Player even with just a few stations.
Sometimes when you want to listen to a station, you may experience some problems. It may happen that fully valid internet radio address will not work because of poor internet connection, quirks of the net or some cosmic reason. Be patient and try the same station again a while later.
When you click on a radio station, wait a few seconds for connection to be established. Sometimes there are several internet servers between you and chosen radio station.
Some internet radio stations have stated their music category, and we used that information to categorize our collection. However, do not take it as absolutely precise, because it is not.
Install Great Little Radio Player in ubuntu
Download deb package from once you have this you need to double click on it to install.
Install Great Little Radio Player in ubuntu
Download deb package from once you have this you need to double click on it to install.

Tuesday, April 16, 2013
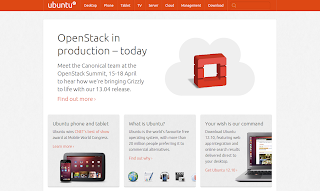
The official Ubuntu website received new interesting design
The care for look & feel can be easily observed in Ubuntu's overall attitude, care for visual elements implemented in the polished Unity, Ubuntu Touch, etc, polished approach presenting Ubuntu as a modern, professional and beautiful experience to millions of users from across the world.
Yet, until using Ubuntu, various newcomers are met by Ubuntu's official website, website greeting also persons interested in the latest announcements, availabilities (as in the case of Ubuntu for phones, Ubuntu for tablets, etc), achieved successes (like for example, awards gained at MWC 2013).
As a consequence, it seems rather natural to affirm that the official Ubuntu website is a relevant gate between the Ubuntu operating system and visitors.
has received a new design, introducing a subtle, more refined look & feel, featuring now minimalist elements, pleasant-to-the-eye item proportions, carefully combined blocks, etc, essentially, presenting itself as a cleaner, more neat and elegant website.
has received a new design, introducing a subtle, more refined look & feel, featuring now minimalist elements, pleasant-to-the-eye item proportions, carefully combined blocks, etc, essentially, presenting itself as a cleaner, more neat and elegant website.

Monday, April 15, 2013
The Ubuntu team is pleased to announce the final beta release of Ubuntu 13.04 Desktop, Server, Cloud, and Core products.
Codenamed "Raring Ringtail", 13.04 continues Ubuntu's proud tradition of integrating the latest and greatest open source technologies into a high-quality, easy-to-use Linux distribution. The team has been hard at work through this cycle, introducing new features and fixing bugs.
Ubuntu 13.04 is the version of the Ubuntu operating system planned to be released on April 25, 2013. The common name given to this release is "Raring Ringtail".
Ubuntu Desktops 12.10 to 13.04
You can easily upgrade over the network with the following procedure. Run the update-manager -d application from the Unity Dash or a command line In Update Manager, click the Settings... button, and enter your password to start the Software Sources application. Select the sub menu Updates from the Software Sources application. Confirm the "Notify me of a new Ubuntu version:" option is set to "For any new version", and change it if otherwise. Close the Software Sources application and return to Update Manager. In Update Manager, click the Check button to check for new updates. If there are any updates to install, use the Install Updates button to install them, and press Check again after that is complete. A message will appear informing you of the availability of the new release. Click Upgrade. Follow the on-screen instructions.
For Ubuntu 12.10 Servers
Install update-manager-core if it is not already installed:
sudo apt-get install update-manager-core
Launch the upgrade tool:
do-release-upgrade -d
Follow the on-screen instructions.
Sunday, April 14, 2013
Ubuntu 13.04 BETA released
In the Raring Ringtail development cycle, the developers decided to ship only a BETA release before the actual stable Ubuntu 13.04 release, consequently, centering the gained development energy into strengthening Ubuntu components.
Raring Ringtail BETA has just been released, freezing the numerous and numerous changes into a BETA stage, allowing users from across the world to grasp, test and observe new features, functionalities, additions and visual polish since the release of Ubuntu 12.10.
What is new in Ubuntu 13.04 BETA?
Unity gained:
* refreshed Unity Previews with distinct containers, fancy animations and state-aware ghost icons (rendered on top and bottom area); navigating through previewed items, moves selected ghost icons accordingly
* tooltip fade animations creating a pleasant-to-the-eye look & feel while hovering the mouse pointer across the launcher
* speed-optimized faster icon reveal when the mouse pointer hits the bottom of the launcher, thus the user is now able to more rapidly access icon hidden by Unity launcher's accordion effect
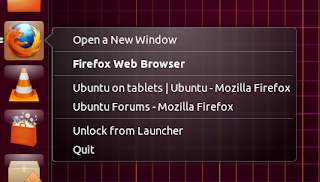
* optimized window-management feature, proving itself handy in situations like (re)focusing a previously-opened Nautilus window if the user clicks on that window's Unity launcher icon entry (like for example, focusing Downloads if the user clicks on Nautilus' Unity launcher Downloads entry, as opposed to opening a new Downloads window) * optimized Dash blur with benefits in speed * enriched Unity launcher quicklists, exposing multiple windows of the same app (having on the desktop two Firefox windows opened and right-clicking on Firefox's Unity launcher icon, presents the latest focused tabs from the two windows on Firefox's Unity launcher quicklist, clicking on an entry, focuses the clicked entry's of-origin tab)
* ability to set the Unity launcher's minimum size as low as 8 pixels

* classy maximize animations
* the BFB / Ubuntu logo icon features a refreshed tooltip description, Search your computer and online sources, change designed in mind with strengthening and clearly describing Dash's functionalities (capable of online searches)

* option to summon opened windows by scrolling the mouse wheel while the mouse pointer is positioned on top of the to-be-scrolled app's Unity launcher icon
* Ayatana Overlay Scrollbar support into the Dash, thus users are able to easily navigate through the Dash's content with a thumb-enabled handy scrollbar
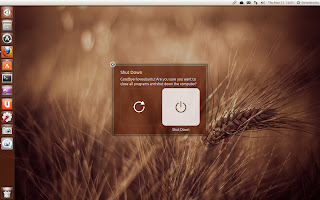
* Unity-style shutdown dialogs incorporating a neat, classy Unity-like texture, big-sized view and monochrome icons; moreover, the beautiful dialogs come with hassle-free interaction behavior, being accessible via Unity panel and HUD, as well as close-able with mouse pointer and Escape key
* new icons for lenses and BFB, latter being expressed with a fresh whirlwind-like icon, while the new lens icons have been redesigned with interesting shapes
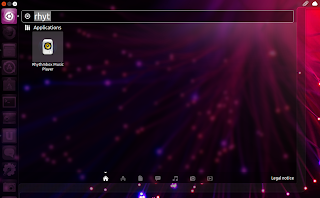
error-tolerant libcolumbus library transforms the Dash into a more user-friendly typing-related interface, library that on-the-fly matches faulty-typed words with accurate words (like for instance, typing fierrrfox is matched as firefox and searched through the Dash accordingly)
Unity panel
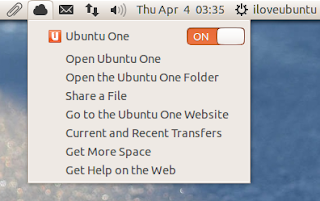
* complete removal of notification area (systray) after years of support (and available time period for developers to migrate applications to Unity's Unity panel) * new Indicator Bluetooth landed by default, indicator designed with Unity in mind * Indicator Sync presents itself as a handy useful manner of accessing Ubuntu One-specific functionalities via the Unity panel, Indicator Sync implemented by default
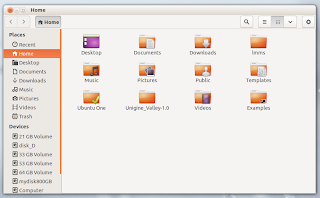
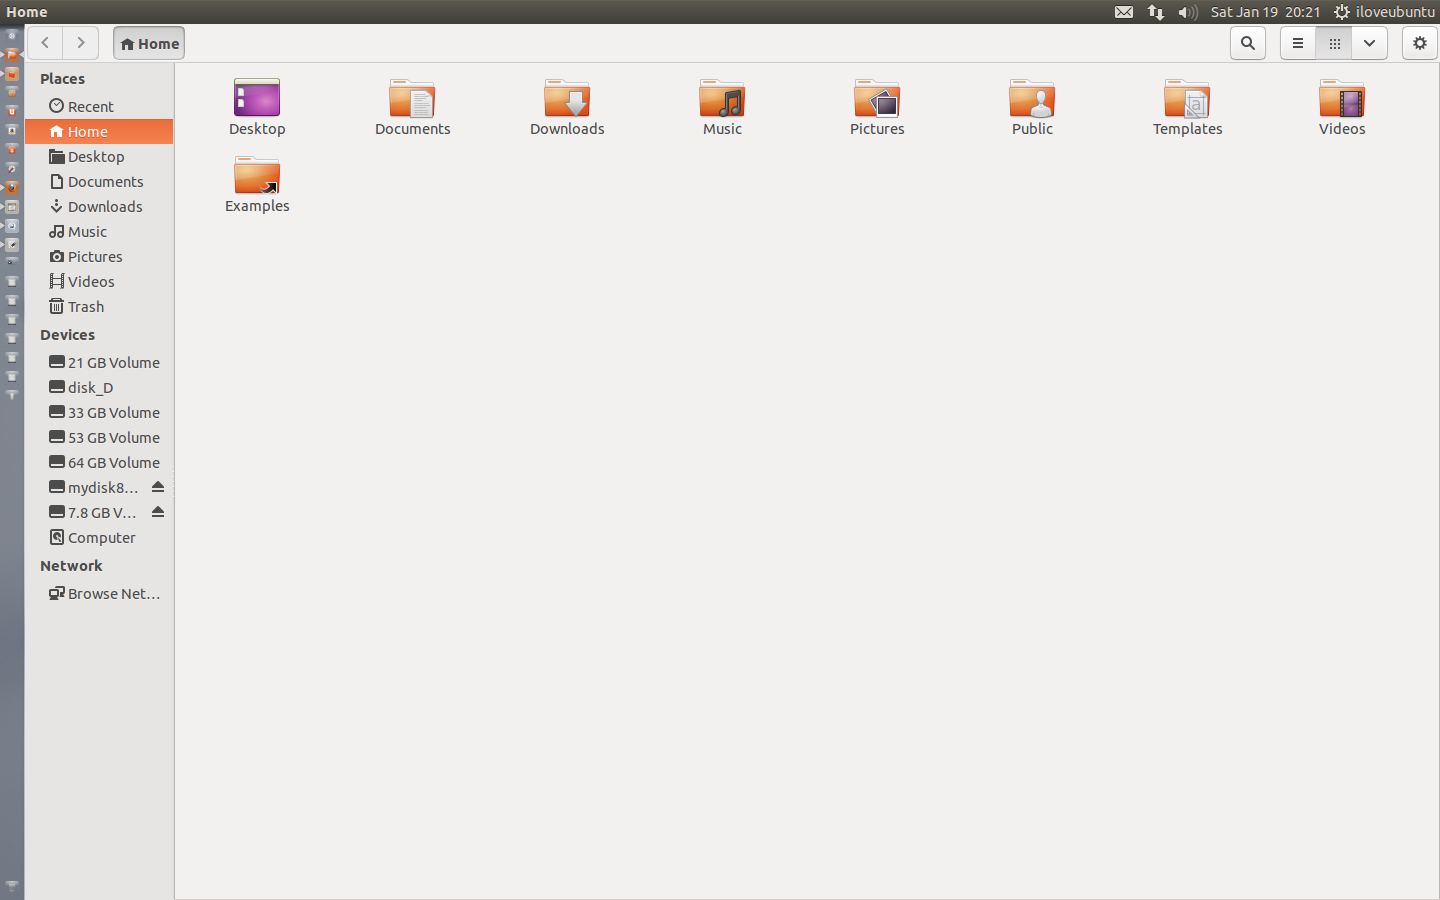
Nautilus 3.6.3 introduces a refined Nautilus version with full toolbar, filled-with-monochrome-icons sidebar, as well as clickable icon-view buttons; commonly-used actions are now housed under its top-right "cog" icon, clicking on it, summons a menu where New Tab, Select All, Redo, etc, are 1-click away available. Moreover, creating empty documents on the desktop is as simple as right-clicking on the desktop (and inside folders) and selecting New Document-->Empty Document, functionality (re)added by the Ubuntu developers, in order to restore the handy minor-yet-relevant feature. Ubuntu 13.04 BETA's Nautilus comes with recursive search support, searching inside a folder (as in search-as-you-type search), reveals items from inside folders contained by the searched-through folder.
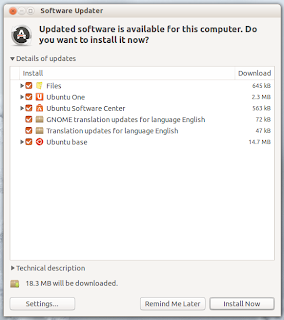
Software Updater incarnates available features into a refined, significantly visually-improved interface with updates categorized in specific apps and Ubuntu base; moreover, updates are exposed with app icons and handy details, taking the update utility to a more good-looking and intuitive experience.
System Settings sees new additions, such as:
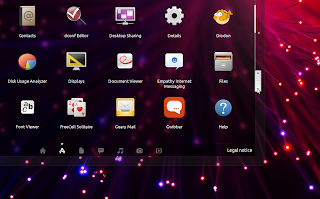
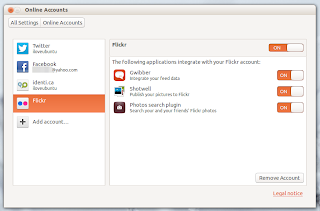
* ability to enable/disable desktop workspaces and to enable/disable the Show Desktop icon on the Unity launcher under Appearance-->Behavior * refreshed Mouse & Touchpad sub-panel with new mouse-testing view * scrollable Legal Notice entry under Details, properly displaying Canonical's legal notice related to online searches performed via the Dash * ability to per-supported-online-service enabling/disabling app integration under Online Accounts (for example, the user is able to disable Facebook integration for Empathy, while simultaneously retaining Facebook integration for Shotwell and Gwibber)
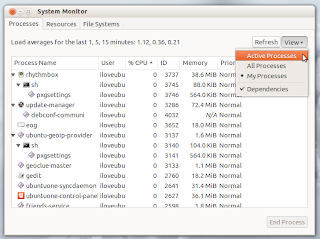
System Monitor retains only three tabs, Processes, Resources and File Systems, while incorporating two handy buttons, Refresh and View, latter allowing the user to on-demand tweak displayed items. System Monitor 3.7.92 comes with a resource-optimized attitude, removing its old resource-hungry aspect.
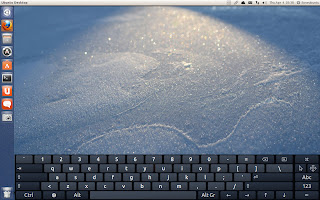
Ubuntu's default virtual keyboard, Onboard, brings docking support, meaning, the user is able to utilize Onboard as a docked view (at the bottom and top of the screen).
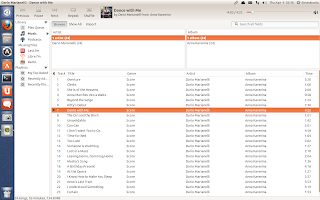
Rhythmbox 2.9.8 adds a fancy built-in import view, acting as a hassle-free manner of importing music directly from inside Rhythmbox; furthermore, last.fm and libre.fm received Love and Ban buttons, useful to express feedback from inside Rhythmbox related to the mentioned online services.
Ubuntu 13.04 BETA received a fancy default wallpaper stack with landscapes, abstract patterns, ringtail cartoon-ish character, captivating shapes, etc, basically, the community-generated wallpapers beautify the desktop with diverse and interesting, non-monotonous backgrounds.

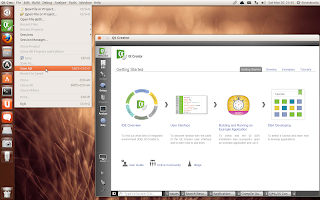
Qt5-based applications are properly supported in Raring BETA, launching (for example) Qt Creator presents an integrated-into-the-desktop app with full appmenu and HUD support.
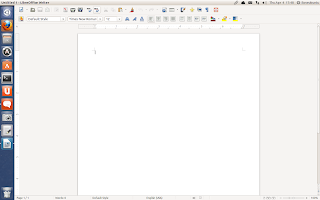
LibreOffice 4.x stable release is available in Ubuntu 13.04 BETA, allowing users to utilize the latest features and improvements of the powerful office suite by default.
Ubuntu 13.04 BETA is available for download on Ubuntu 13.04 final will be released on April 25th, 2013.
What is new in Ubuntu 13.04 BETA?
Unity gained:
* refreshed Unity Previews with distinct containers, fancy animations and state-aware ghost icons (rendered on top and bottom area); navigating through previewed items, moves selected ghost icons accordingly

* tooltip fade animations creating a pleasant-to-the-eye look & feel while hovering the mouse pointer across the launcher
* speed-optimized faster icon reveal when the mouse pointer hits the bottom of the launcher, thus the user is now able to more rapidly access icon hidden by Unity launcher's accordion effect
* optimized window-management feature, proving itself handy in situations like (re)focusing a previously-opened Nautilus window if the user clicks on that window's Unity launcher icon entry (like for example, focusing Downloads if the user clicks on Nautilus' Unity launcher Downloads entry, as opposed to opening a new Downloads window) * optimized Dash blur with benefits in speed * enriched Unity launcher quicklists, exposing multiple windows of the same app (having on the desktop two Firefox windows opened and right-clicking on Firefox's Unity launcher icon, presents the latest focused tabs from the two windows on Firefox's Unity launcher quicklist, clicking on an entry, focuses the clicked entry's of-origin tab)

* ability to set the Unity launcher's minimum size as low as 8 pixels
* classy maximize animations
* the BFB / Ubuntu logo icon features a refreshed tooltip description, Search your computer and online sources, change designed in mind with strengthening and clearly describing Dash's functionalities (capable of online searches)

* option to summon opened windows by scrolling the mouse wheel while the mouse pointer is positioned on top of the to-be-scrolled app's Unity launcher icon
* Ayatana Overlay Scrollbar support into the Dash, thus users are able to easily navigate through the Dash's content with a thumb-enabled handy scrollbar

* Unity-style shutdown dialogs incorporating a neat, classy Unity-like texture, big-sized view and monochrome icons; moreover, the beautiful dialogs come with hassle-free interaction behavior, being accessible via Unity panel and HUD, as well as close-able with mouse pointer and Escape key

* new icons for lenses and BFB, latter being expressed with a fresh whirlwind-like icon, while the new lens icons have been redesigned with interesting shapes

error-tolerant libcolumbus library transforms the Dash into a more user-friendly typing-related interface, library that on-the-fly matches faulty-typed words with accurate words (like for instance, typing fierrrfox is matched as firefox and searched through the Dash accordingly)
Unity panel
* complete removal of notification area (systray) after years of support (and available time period for developers to migrate applications to Unity's Unity panel) * new Indicator Bluetooth landed by default, indicator designed with Unity in mind * Indicator Sync presents itself as a handy useful manner of accessing Ubuntu One-specific functionalities via the Unity panel, Indicator Sync implemented by default

Nautilus 3.6.3 introduces a refined Nautilus version with full toolbar, filled-with-monochrome-icons sidebar, as well as clickable icon-view buttons; commonly-used actions are now housed under its top-right "cog" icon, clicking on it, summons a menu where New Tab, Select All, Redo, etc, are 1-click away available. Moreover, creating empty documents on the desktop is as simple as right-clicking on the desktop (and inside folders) and selecting New Document-->Empty Document, functionality (re)added by the Ubuntu developers, in order to restore the handy minor-yet-relevant feature. Ubuntu 13.04 BETA's Nautilus comes with recursive search support, searching inside a folder (as in search-as-you-type search), reveals items from inside folders contained by the searched-through folder.

Software Updater incarnates available features into a refined, significantly visually-improved interface with updates categorized in specific apps and Ubuntu base; moreover, updates are exposed with app icons and handy details, taking the update utility to a more good-looking and intuitive experience.

System Settings sees new additions, such as:
* ability to enable/disable desktop workspaces and to enable/disable the Show Desktop icon on the Unity launcher under Appearance-->Behavior * refreshed Mouse & Touchpad sub-panel with new mouse-testing view * scrollable Legal Notice entry under Details, properly displaying Canonical's legal notice related to online searches performed via the Dash * ability to per-supported-online-service enabling/disabling app integration under Online Accounts (for example, the user is able to disable Facebook integration for Empathy, while simultaneously retaining Facebook integration for Shotwell and Gwibber)

System Monitor retains only three tabs, Processes, Resources and File Systems, while incorporating two handy buttons, Refresh and View, latter allowing the user to on-demand tweak displayed items. System Monitor 3.7.92 comes with a resource-optimized attitude, removing its old resource-hungry aspect.

Ubuntu's default virtual keyboard, Onboard, brings docking support, meaning, the user is able to utilize Onboard as a docked view (at the bottom and top of the screen).

Rhythmbox 2.9.8 adds a fancy built-in import view, acting as a hassle-free manner of importing music directly from inside Rhythmbox; furthermore, last.fm and libre.fm received Love and Ban buttons, useful to express feedback from inside Rhythmbox related to the mentioned online services.

Ubuntu 13.04 BETA received a fancy default wallpaper stack with landscapes, abstract patterns, ringtail cartoon-ish character, captivating shapes, etc, basically, the community-generated wallpapers beautify the desktop with diverse and interesting, non-monotonous backgrounds.

Qt5-based applications are properly supported in Raring BETA, launching (for example) Qt Creator presents an integrated-into-the-desktop app with full appmenu and HUD support.

LibreOffice 4.x stable release is available in Ubuntu 13.04 BETA, allowing users to utilize the latest features and improvements of the powerful office suite by default.

Ubuntu 13.04 BETA is available for download on Ubuntu 13.04 final will be released on April 25th, 2013.
Saturday, April 13, 2013
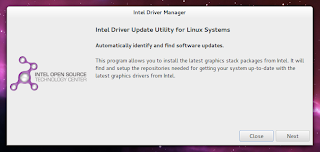
Intel Release Graphical Installer for Their Linux Drivers
The Intel Linux Graphics Installer provides a friendly way for downloading the latest Intel Linux graphics software stack.
Early in March, Intel –specifically the Intel Open Source Technology Centre– released a graphical installer providing Linux users with a friendly way for downloading the latest Intel-related open source Linux graphics components –for the more technical this includes:
* the Intel core kernel driver * Mesa 3D rendering library, responsible for 3D rendering, OpenGL compatibility, GLES, etc. * the 2D renderer for the X Window stack (xf86-video-intel), also known as DDX. * libdrm –the “Direct Rendering Manager” library, for communication between user applications and the kernel * the Cairo graphics library, for 2D rendering and acceleration * vaapi-driver-intel –the APIs for hardware-accelerated video rendering, processing and output * initial support for Wayland
Getting the Latest and Greatest Intel Linux Drivers
Intel Linux Graphics Installer automatically detects your hardware and system specifics and adds a software repository to your sources for keeping you up-to-date. The installer also performs a check to see if your system is running the latest drivers and, if not, it runs a system upgrade.
However, the installer doesn’t automatically add the repository authentication key to your system but it can manually added by opening a terminal, and executing:
wget --no-check-certificate https://download.01.org/gfx/RPM-GPG-KEY-ilg -O - | \ sudo apt-key add -
* the Intel core kernel driver * Mesa 3D rendering library, responsible for 3D rendering, OpenGL compatibility, GLES, etc. * the 2D renderer for the X Window stack (xf86-video-intel), also known as DDX. * libdrm –the “Direct Rendering Manager” library, for communication between user applications and the kernel * the Cairo graphics library, for 2D rendering and acceleration * vaapi-driver-intel –the APIs for hardware-accelerated video rendering, processing and output * initial support for Wayland
Getting the Latest and Greatest Intel Linux Drivers
Intel Linux Graphics Installer automatically detects your hardware and system specifics and adds a software repository to your sources for keeping you up-to-date. The installer also performs a check to see if your system is running the latest drivers and, if not, it runs a system upgrade.

However, the installer doesn’t automatically add the repository authentication key to your system but it can manually added by opening a terminal, and executing:
wget --no-check-certificate https://download.01.org/gfx/RPM-GPG-KEY-ilg -O - | \ sudo apt-key add -
Tuesday, April 9, 2013
10 Useful “IP” Commands to Configure Network Interfaces
In this post, we are going to review how we can assign Static IP Address, Static Route, Default Gateway etc. Assigning IP Address on demand using IP command. IFCONFIG command is deprecated and replaced by IP command in Linux. However, IFCONFIG command is still works and available for most of the Linux distributions.
How do i Configure Static IP Address Internet Protocol (IPv4)
To configure static IP Address, you need to update or edit network configuration file to assign an Static IP Address to a system. You must be superuser with su (switch user) command from terminal or command prompt.
For RHEL/CentOS/Fedora
Open and edit network configuration file for (eth0 or eth1) using your favorite editor. For example, to assigning IP Address to eth0 interface as follows.
[root@tecmint ~]# vi /etc/sysconfig/network-scripts/ifcfg-eth0
Simple output:
DEVICE="eth0" BOOTPROTO=static ONBOOT=yes TYPE="Ethernet" IPADDR=192.168.50.2 NAME="System eth0" HWADDR=00:0C:29:28:FD:4C GATEWAY=192.168.50.1
For Ubuntu/Debian/Linux Mint
Assign Static IP Address to eth0 interface editing configuration file /etc/network/interfaces to make permanent changes as shown below.
auto eth0 iface eth0 inet static address 192.168.50.2 netmask 255.255.255.0 gateway 192.168.50.1
Next, restart network services after entering all the details using the following command.
# /etc/init.d/networking restart
$ sudo /etc/init.d/networking restart
1. How to Assign a IP Address to Specific Interface
The following command used to assign IP Address to a specific interface (eth1) on the fly.
# ip addr add 192.168.50.5 dev eth1
$ sudo ip addr add 192.168.50.5 dev eth1
Note: Unfortunately all these settings will be lost after a system restart.
2. How to Check an IP Address
To get the depth information of your network interfaces like IP Address, MAC Address information, use the following command as shown below.
# ip addr show
$ sudo ip addr show
Sample Output
1: lo: mtu 16436 qdisc noqueue state UNKNOWN
link/loopback 00:00:00:00:00:00 brd 00:00:00:00:00:00
inet 127.0.0.1/8 scope host lo
inet6 ::1/128 scope host
valid_lft forever preferred_lft forever
2: eth0: mtu 1500 qdisc pfifo_fast state UNKNOWN qlen 1000
link/ether 00:0c:29:28:fd:4c brd ff:ff:ff:ff:ff:ff
inet 192.168.50.2/24 brd 192.168.50.255 scope global eth0
inet6 fe80::20c:29ff:fe28:fd4c/64 scope link
valid_lft forever preferred_lft forever
3: eth1: mtu 1500 qdisc pfifo_fast state UNKNOWN qlen 1000
link/ether 00:0c:29:28:fd:56 brd ff:ff:ff:ff:ff:ff
inet 192.168.50.5/24 scope global eth1
inet6 fe80::20c:29ff:fe28:fd56/64 scope link
valid_lft forever preferred_lft forever
3. How to Remove an IP Address
The following command will remove an assigned IP address from the given interface (eth1).
# ip addr del 192.168.50.5/24 dev eth1
$ sudo ip addr del 192.168.50.5/24 dev eth1
4. How to Enable Network Interface
The “up” flag with interface name (eth1) enables a network interface. For example, the following command will activates the eth1 network interface.
# ip link set eth1 up
$ sudo ip link set eth1 up
5. How to Disable Network Interface
The “down” flag with interface name (eth1) disables a network interface. For example, the following command will De-activates the eth1 network interface.
# ip link set eth1 down
$ sudo ip link set eth1 down
6. How do I Check Route Table?
Type the following command to check the routing table information of system.
# ip route show
$ sudo ip route show
Sample Output
10.10.20.0/24 via 192.168.50.100 dev eth0 192.168.160.0/24 dev eth1 proto kernel scope link src 192.168.160.130 metric 1 192.168.50.0/24 dev eth0 proto kernel scope link src 192.168.50.2 169.254.0.0/16 dev eth0 scope link metric 1002 default via 192.168.50.1 dev eth0 proto static
7. How do I Add Static Route
Why you need to add Static routes or Manual routes, because that the traffic must not pass through the default gateway. We need to add Static routes to pass traffic from best way to reach the destination.
# ip route add 10.10.20.0/24 via 192.168.50.100 dev eth0
$ sudo ip route add 10.10.20.0/24 via 192.168.50.100 dev eth0
8. How to Remove Static Route
To remove assigned static route, simply type the following command.
# ip route del 10.10.20.0/24
$ sudo ip route del 10.10.20.0/24
9. How do I Add Persistence Static Routes
All the above route will be lost after a system restart. To add permanent Static route, edit file /etc/sysconfig/network-scripts/route-eth0 (We are storing static route for (eth0) and add the following lines and save and exist. By default route-eth0 file will not be there, need to be created.
For RHEL/CentOS/Fedora
# vi /etc/sysconfig/network-scripts/route-eth0 10.10.20.0/24 via 192.168.50.100 dev eth0
For Ubuntu/Debian/Linux Mint
Open the file /etc/network/interfaces and at the end add the persistence Static routes. IP Addresses may differ in your environment.
$ sudo vi /etc/network/interfaces
auto eth0 iface eth0 inet static address 192.168.50.2 netmask 255.255.255.0 gateway 192.168.50.100 #########{Static Route}########### up ip route add 10.10.20.0/24 via 192.168.50.100 dev eth0
Next, restart network services after entering all the details using the following command.
# /etc/init.d/network restart
$ sudo /etc/init.d/network restart
10. How do I Add Default Gateway
Default gateway can be specified globally or for in interface-specific config file. Advantage of default gateway is If we have more than one NIC is present in the system. You can add default gateway on the fly as shown below command.
# ip route add default via 192.168.50.100
$ sudo ip route add default via 192.168.50.100
Kindly correct me if i missed out. Please refer manual page doing man ip from terminal/command prompt to know more about IP Command.
How do i Configure Static IP Address Internet Protocol (IPv4)
To configure static IP Address, you need to update or edit network configuration file to assign an Static IP Address to a system. You must be superuser with su (switch user) command from terminal or command prompt.
For RHEL/CentOS/Fedora
Open and edit network configuration file for (eth0 or eth1) using your favorite editor. For example, to assigning IP Address to eth0 interface as follows.
[root@tecmint ~]# vi /etc/sysconfig/network-scripts/ifcfg-eth0
Simple output:
DEVICE="eth0" BOOTPROTO=static ONBOOT=yes TYPE="Ethernet" IPADDR=192.168.50.2 NAME="System eth0" HWADDR=00:0C:29:28:FD:4C GATEWAY=192.168.50.1
For Ubuntu/Debian/Linux Mint
Assign Static IP Address to eth0 interface editing configuration file /etc/network/interfaces to make permanent changes as shown below.
auto eth0 iface eth0 inet static address 192.168.50.2 netmask 255.255.255.0 gateway 192.168.50.1
Next, restart network services after entering all the details using the following command.
# /etc/init.d/networking restart
$ sudo /etc/init.d/networking restart
1. How to Assign a IP Address to Specific Interface
The following command used to assign IP Address to a specific interface (eth1) on the fly.
# ip addr add 192.168.50.5 dev eth1
$ sudo ip addr add 192.168.50.5 dev eth1
Note: Unfortunately all these settings will be lost after a system restart.
2. How to Check an IP Address
To get the depth information of your network interfaces like IP Address, MAC Address information, use the following command as shown below.
# ip addr show
$ sudo ip addr show
Sample Output
1: lo:
3. How to Remove an IP Address
The following command will remove an assigned IP address from the given interface (eth1).
# ip addr del 192.168.50.5/24 dev eth1
$ sudo ip addr del 192.168.50.5/24 dev eth1
4. How to Enable Network Interface
The “up” flag with interface name (eth1) enables a network interface. For example, the following command will activates the eth1 network interface.
# ip link set eth1 up
$ sudo ip link set eth1 up
5. How to Disable Network Interface
The “down” flag with interface name (eth1) disables a network interface. For example, the following command will De-activates the eth1 network interface.
# ip link set eth1 down
$ sudo ip link set eth1 down
6. How do I Check Route Table?
Type the following command to check the routing table information of system.
# ip route show
$ sudo ip route show
Sample Output
10.10.20.0/24 via 192.168.50.100 dev eth0 192.168.160.0/24 dev eth1 proto kernel scope link src 192.168.160.130 metric 1 192.168.50.0/24 dev eth0 proto kernel scope link src 192.168.50.2 169.254.0.0/16 dev eth0 scope link metric 1002 default via 192.168.50.1 dev eth0 proto static
7. How do I Add Static Route
Why you need to add Static routes or Manual routes, because that the traffic must not pass through the default gateway. We need to add Static routes to pass traffic from best way to reach the destination.
# ip route add 10.10.20.0/24 via 192.168.50.100 dev eth0
$ sudo ip route add 10.10.20.0/24 via 192.168.50.100 dev eth0
8. How to Remove Static Route
To remove assigned static route, simply type the following command.
# ip route del 10.10.20.0/24
$ sudo ip route del 10.10.20.0/24
9. How do I Add Persistence Static Routes
All the above route will be lost after a system restart. To add permanent Static route, edit file /etc/sysconfig/network-scripts/route-eth0 (We are storing static route for (eth0) and add the following lines and save and exist. By default route-eth0 file will not be there, need to be created.
For RHEL/CentOS/Fedora
# vi /etc/sysconfig/network-scripts/route-eth0 10.10.20.0/24 via 192.168.50.100 dev eth0
For Ubuntu/Debian/Linux Mint
Open the file /etc/network/interfaces and at the end add the persistence Static routes. IP Addresses may differ in your environment.
$ sudo vi /etc/network/interfaces
auto eth0 iface eth0 inet static address 192.168.50.2 netmask 255.255.255.0 gateway 192.168.50.100 #########{Static Route}########### up ip route add 10.10.20.0/24 via 192.168.50.100 dev eth0
Next, restart network services after entering all the details using the following command.
# /etc/init.d/network restart
$ sudo /etc/init.d/network restart
10. How do I Add Default Gateway
Default gateway can be specified globally or for in interface-specific config file. Advantage of default gateway is If we have more than one NIC is present in the system. You can add default gateway on the fly as shown below command.
# ip route add default via 192.168.50.100
$ sudo ip route add default via 192.168.50.100
Kindly correct me if i missed out. Please refer manual page doing man ip from terminal/command prompt to know more about IP Command.
Thursday, April 4, 2013
Unity Tweak Tool is Now Available in Raring
The new contender for everyone’s favourite tweak tool has been approved for inclusion in the official Raring repositories. So get out there and download it folks!
as of now it is only available via PPA.
sudo add-apt-repository ppa:freyja-dev/unity-tweak-tool-daily sudo apt-get update && sudo apt-get install unity-tweak-tool

as of now it is only available via PPA.
sudo add-apt-repository ppa:freyja-dev/unity-tweak-tool-daily sudo apt-get update && sudo apt-get install unity-tweak-tool
WPS Office – A Faithful Microsoft Office Clone for Linux

When is Microsoft Office not Microsoft Office? When it’s actually a faithfully-crafted imitation, of course! WPS Office, built by Chinese development group Kingsoft, claims to be the leading free office suite in China. And with such a familiar looking interface that’s not a difficult notion to swallow.
Three applications make up the suite:
* Writer – Word processing application * Presentation – Slideshow presentation maker * Spreadsheets – Spreadsheet application
Each of the apps are incredibly familiar in look to their Microsoft counterparts. Compared to other free offerings like LibreOffice, Google Docs, and Lotus Symphony, WPS has a distinct advantage: a lower learning curve for those already versed, trained, or used to the Windows apps. Trivial sounding, sure. But for many the notion of having relearn what they already know fosters reluctance. WPS, with its marriage of free and familiar, has a good punt at solving this. Features The Qt suite apes the interface of Microsoft’s ‘Ribbon’ interface, and whilst I can’t tell you whether it’s 100% accurate in its replication (I haven’t used Microsoft Office long enough to tell), it’s certainly authentic looking. For non-Ribbon fans WPS Office comes with the option of enabling the old, menu-based Office look

WPS Office also adds a few handy features of its own, including an online pool of document templates and the ability to edit multiple documents in tabs. Biggest drawbacks: the release is beta; it sucks at opening .ODT files. Oh, and the entire interface is in Chinese by default
[How To] Run Unity Next on Ubuntu 12.10

Unity Next, the next-generation Qt/QML version of Ubuntu’s Unity interface designed to intelligently adapt to multiple form factors, can now be tried, tested, and hacked-on right from the desktop. You’ll need to be running Ubuntu 12.10 and know your way around the command line to get it up and running. It’ll also help if you’re a dab hand at being able to deal with compiling errors. Now, the method below, taken from the Unity developers page, isn’t fool-proof. Indeed, due to a slight regression with the HUD I needed to manually install packages from the Phablet PPA – not something that’s recommended on the desktop! This error should be fixed shortly. Warnings aside, if you’re brave, aware of the pitfalls, and want to proceed, just follow these instructions… Step One: Source Grabbin’ First things first: create a folder to house all of the Unity Next code:
mkdir ~/unity
Then install Bzr and pull the Unity Next source code:
sudo apt-get install bzr bzr branch lp:unity/phablet ~/unity/unity-next cd ~/unity/unity-next
Step Two: Building Stuff Next, run the following command:
./build -s
This step will add couple of PPAs to your system, build and install some required branches, and install a bundle of necessary dependencies. Step Three: Building More Stuff Now build Unity Next by issuing the following:
./build
tep Four: Running Unity Next Run the People Lens daemon to enable ‘contacts’ in your
~/unity/unity_build/libexec/unity-people-daemon
To run Unity Next in a window on your desktop run:
cd ~/unity/unity-next ./run
If all of the steps above have completed correctly you should see this:
Notes To keep your Unity Next build updated run the following two commands every now and then:
./build_unity -u ./build_unity
To build a-fresh, run:
./build_unity --clean
Unity Next is currently designed for touch-input so you’ll need to pretend that your mouse is a finger – o.e click and drag your way around the interface. To go from ‘phone’ to ‘tablet’ interface just resize the Unity Next window. Lastly, please remember that this entire schaboodle is under active development. That means you can’t complain if something is missing, broken, or buggy. Seriously. For further information on running Unity Next on your desktop, as well as building and developing for it, head over to the Unity Developer Pages.
Tuesday, April 2, 2013
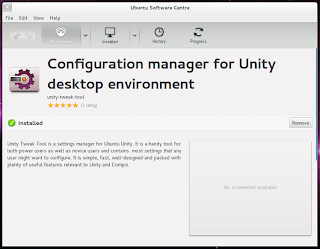
Unity Tweak Tool landed in Raring's Ubuntu Software Center
By default, Ubuntu ships a solid set of defaults, applicable to applications, desktop behavior and Unity settings.
Yet, where there are millions of users, there are numerous preferences and filtered-through-one's-needs use-cases, situations handle-able via tweaking tools.
Unity Tweak Tool is a powerful tweaking tool that incorporates a serious bundle of features under an intuitive, user-friendly interface.
Unity Tweak Tool 0.0.3 has landed in Raring Ringtail's Ubuntu Software Center, incarnating months of development into a stable, usable release.
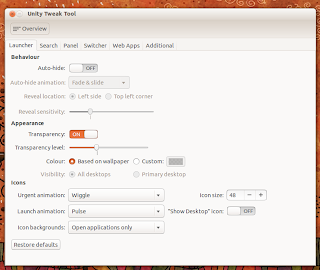
Launching the app, the user is to notice a pleasant visual contrast between vividly-colored icons and monochrome category icons, clearly differentiating categories from clickable contained-into configuration options.

The offered to-be-tweaked options are categorized in Unity, Window Manager, Appearance and System, basically, Unity Tweak Tool covers the whole of the desktop. Changing Unity launcher's auto-hide behavior, animations, reveal locations, Dash color, icon animations, enable / disable More Suggestions, menu visibility's period of time, show / hide indicators, change Alt+Tab Switcher's keyboard shortcut, etc, are 1-click away available under the Unity category.
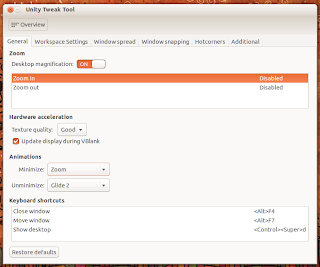
Window Manager structures handy functionalities, allowing the user to hassle-free enable / disable the WorkSpace Switcher, add extra workspaces, add custom actions per desktop space (such as, rendering a dragged window on the bottom-half of the screen when the user pushes it against the top-left corner of the screen), adjust hot-corners (in order to bring custom functionalities to the desktop), etc.
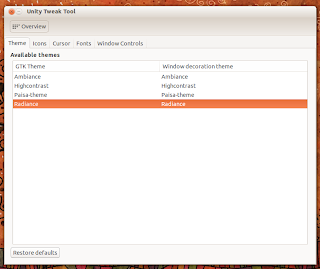
Selecting GTK+, icon and cursor themes is to be performed via Appearance, where theming-related entries are properly displayed, including used fonts and window controls; the Theme sub-panel comes with handy support for selecting both default and non-default GTK+ themes, meaning, copying a theme folder under .themes (or /usr/share/themes), is automatically pushed under Theme (thus being 1-click away available).
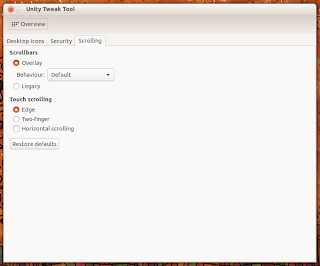
System houses a basic yet relevant pack of options, presenting itself as an easy manner of showing / hiding icons on / from the desktop, adding specific icons to the desktop (like for example devices, Trash, Network), etc.
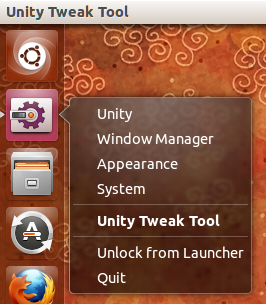
Integration into the desktop has been definitely considered by the tweaking tool, providing both enhanced Unity launcher quicklist and full HUD support.
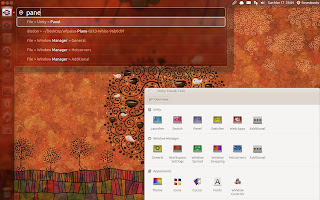
Hitting the keyboard's Alt key, typing (for example) panel and pressing the Enter key, opens Unity Tweak Tool accordingly.
Unity Tweak Tool is available for installation in Ubuntu Software Center (Raring Ringtail).

The offered to-be-tweaked options are categorized in Unity, Window Manager, Appearance and System, basically, Unity Tweak Tool covers the whole of the desktop. Changing Unity launcher's auto-hide behavior, animations, reveal locations, Dash color, icon animations, enable / disable More Suggestions, menu visibility's period of time, show / hide indicators, change Alt+Tab Switcher's keyboard shortcut, etc, are 1-click away available under the Unity category.

Window Manager structures handy functionalities, allowing the user to hassle-free enable / disable the WorkSpace Switcher, add extra workspaces, add custom actions per desktop space (such as, rendering a dragged window on the bottom-half of the screen when the user pushes it against the top-left corner of the screen), adjust hot-corners (in order to bring custom functionalities to the desktop), etc.

Selecting GTK+, icon and cursor themes is to be performed via Appearance, where theming-related entries are properly displayed, including used fonts and window controls; the Theme sub-panel comes with handy support for selecting both default and non-default GTK+ themes, meaning, copying a theme folder under .themes (or /usr/share/themes), is automatically pushed under Theme (thus being 1-click away available).

System houses a basic yet relevant pack of options, presenting itself as an easy manner of showing / hiding icons on / from the desktop, adding specific icons to the desktop (like for example devices, Trash, Network), etc.

Integration into the desktop has been definitely considered by the tweaking tool, providing both enhanced Unity launcher quicklist and full HUD support.

Hitting the keyboard's Alt key, typing (for example) panel and pressing the Enter key, opens Unity Tweak Tool accordingly.

Unity Tweak Tool is available for installation in Ubuntu Software Center (Raring Ringtail).
New icons for Nautilus and Software Updater landed in Ubuntu 13.04
Attractive visual elements have been definitely considered by the developers in the Raring Ringtail development cycle, Ubuntu version receiving refreshed Unity Previews, refined Software Updater, new lens icons, beautiful Unity-style shutdown dialogs, etc.
Months ago, the developers shared (via launchpad) a small bundle of new icons, aimed at changing various desktop icons, effort progressively implemented in Raring.
The latest updates enrich Raring Ringtail with new icons for Nautilus and Software Updater, icons beautifying the Unity launcher.

Nautilus is now expressed with a container-like look & feel, properly incorporating relevant identity details into the new icon. Software Updater visually centers an A shape and a suggestive progressbar, overall look encompassed by a rounded thick line, latter transmitting its main constantly-updating functionality.

Nautilus is now expressed with a container-like look & feel, properly incorporating relevant identity details into the new icon. Software Updater visually centers an A shape and a suggestive progressbar, overall look encompassed by a rounded thick line, latter transmitting its main constantly-updating functionality.
[How To] Turn An Old Computer into a File-Sharing Server
Like myself, you may have an old, outdated piece of computing hardware lying around, a great use for it – besides being a dust collector – would be to turn it into a file/media sharing server.
“Server” brings up images of a zillion gaudy-coloured cables and water cooled racks of computers tucked away in some warehouse somewhere. However, a server is simply any computer that “serves” data to another computer and setting up such a thing is actually very simple:
So dig out your relic, plug it in (connect a gaudy Ethernet cable if you want) and, if not already done, download and install your favourite Ubuntu spin.
Next we’ll need to set up a protocol for our server to share files with. I chose Samba mainly for its cross-platform compatibility – i.e. with Windows, Android, etc. – as not all of the devices on my network are running Linux.
For the unfamiliar: Samba is the free software implementation of the SMB/CIFS protocol used for sharing files, printer access, among other things over a local network.
First things first, we’ll need to install Samba on the to-be server. Which can be done by using the command line:
sudo apt-get install samba
Once that’s complete, we’ll edit the system-wide Samba configuration to set up a new “share”. Run in a terminal:
sudo gedit /etc/samba/smb.conf
This’ll open a lengthy text file, where you can use the following template to create a simple Samba share to append (replacing the values with your own, of course) and save.
[ShareName] comment = An optional description of your share. path = /home/example/directory browseable = yes read only = no guest ok = yes guest only = yes
Just a brief explanation of these options:
* comment: a short (human-readable) description of your share, e.g. “My Share”. * path: the location of the folder you want to share, for example /home/yourname/Music. * browseable: whether the share location will be able to be browsed remotely. * read only: setting to “yes” means computers accessing the share cannot create/delete files. * guest ok: “yes” here means that computers can access this share without requiring a username or password. * guest only: this is optional, if ”yes” allows only guest access, i.e. no user login.
Of course, this is a configuration for a simple public share –public, as in anyone on the same network as would have access. Also, do not edit any other elements of the config file unless you know what you’re doing.
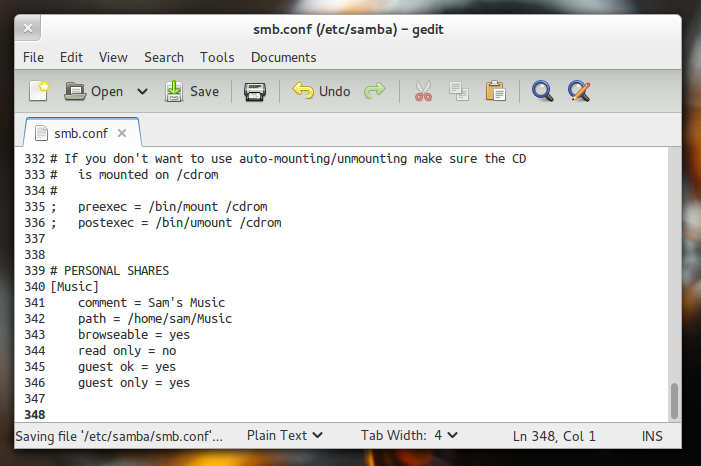
Now after a reboot, your Samba share ought to be up and running. Connecting to Your New Server
In your favourite file manager you can access the server by browsing your local network –from the sidebar in Nautilus, for example– which would show all devices, including your newly created server, that are connected. Alternatively in the location bar of your file browser you can enter the network address of the server:
smb:///
There you have it, your very own file server.
First things first, we’ll need to install Samba on the to-be server. Which can be done by using the command line:
sudo apt-get install samba
Once that’s complete, we’ll edit the system-wide Samba configuration to set up a new “share”. Run in a terminal:
sudo gedit /etc/samba/smb.conf
This’ll open a lengthy text file, where you can use the following template to create a simple Samba share to append (replacing the values with your own, of course) and save.
[ShareName] comment = An optional description of your share. path = /home/example/directory browseable = yes read only = no guest ok = yes guest only = yes
Just a brief explanation of these options:
* comment: a short (human-readable) description of your share, e.g. “My Share”. * path: the location of the folder you want to share, for example /home/yourname/Music. * browseable: whether the share location will be able to be browsed remotely. * read only: setting to “yes” means computers accessing the share cannot create/delete files. * guest ok: “yes” here means that computers can access this share without requiring a username or password. * guest only: this is optional, if ”yes” allows only guest access, i.e. no user login.
Of course, this is a configuration for a simple public share –public, as in anyone on the same network as would have access. Also, do not edit any other elements of the config file unless you know what you’re doing.
Now after a reboot, your Samba share ought to be up and running. Connecting to Your New Server
In your favourite file manager you can access the server by browsing your local network –from the sidebar in Nautilus, for example– which would show all devices, including your newly created server, that are connected. Alternatively in the location bar of your file browser you can enter the network address of the server:
smb:///
There you have it, your very own file server.
New Unity-Styled Shutdown Dialogs Heading To Ubuntu 13.04
New Unity-styled shutdown dialogs are gearing up to arrive in Ubuntu 13.04 – and boy do they look good!
The dialogs, which were originally designed for Ubuntu 12.04, provide Unity-themed prompts for the acts of shutting down, logging out, and rebooting your system.
When an item is selected from the Session menu one of the following two windows appears:
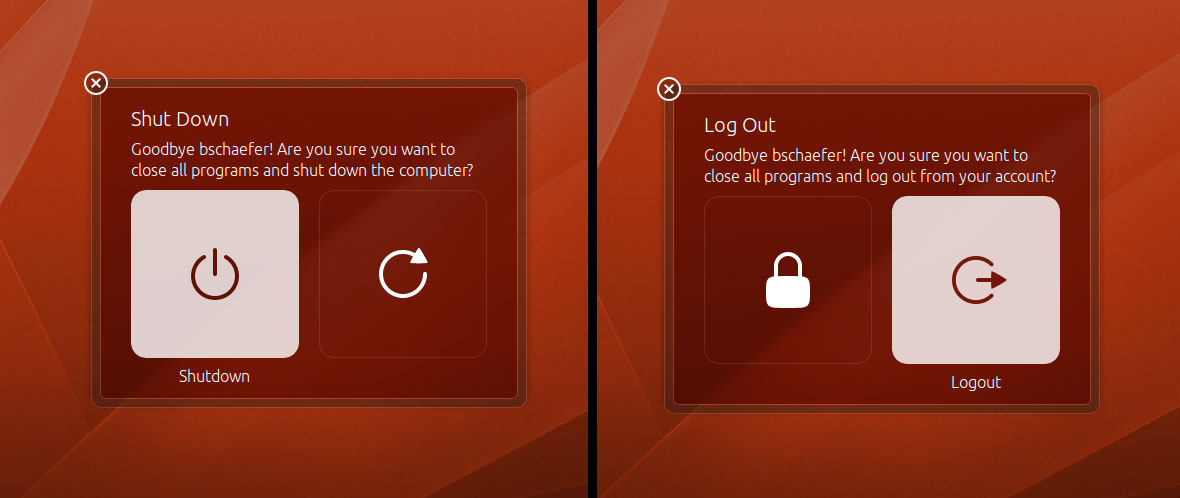
When the power button of the device is pressed a larger prompt with additional options appears, as developer Marco Trevisan, who has worked on the dialogs, demoes in the following video:
Like much of the Unity interface the dialog windows are ‘chameleonic’; the background colour of the window adapts to match the average colour of the desktop wallpaper. Although a bit more testing is needed before these changes are pushed to the desktop they are looking like a dead cert for inclusion this time around. Better late than never, eh?

